zeta2 autonomous
목표: 로봇이 자율주행 할 수 있게 한다.
이 과정에서는 로봇을 사용하여 mapping 하고 navigation 하는 것 까지 해보겠습니다.
mapping 의 방법으론 slam_tool_box 패키지와 cartographer 패키지 두개를 사용해서 해보도록 하겠습니다.
이 과정은 우분투 PC 에서 진행을 해야합니다. 패키지 또한 로봇에 설치하는 것이 아닌 PC에서 새로 만들 것입니다.
앞서 WiFi Setting을 했기 때문에 우리는 문제 없이 로봇과 연결 할 수 있습니다.
전제조건
zeta2_bringup 을 먼저 완료해야 합니다.
1 필요한 패키지들 설치
slam_tool_box 패키지와 cartographer, navigation 관련 패키지는 아래의 명령어로 설치할 수 있습니다.
sudo apt update

# slam_toolbox
sudo apt install ros-humble-slam-toolbox -y

# cartographer
sudo apt install ros-humble-cartographer -y
sudo apt install ros-humble-cartographer-ros -y

# navigation
sudo apt install ros-humble-xacro -y
sudo apt install ros-humble-navigation2 -y
sudo apt install ros-humble-nav2-bringup -y
다음으론 zeta2_autonomous 패키지를 설치하겠습니다.
Note
소스 해주기 전
과거 과정에서 소스 자동화를 하지 않았다면 여기서 해주는게 편합니다.
PC의 터미널을 열고
echo "source /opt/ros/humble/setup.bash" >> ~/.bashrc

source ~/.bashrc
이 명령어를 입력합니다.
한 번만 입력해 두면 다음부터 새로운 터미널을 열 때 마다 자동으로 소스가 진행 됩니다.
source /opt/ros/humble/setup.bash // 위의 note 과정을 진행했으면 생략 가능

mkdir -p ~/zeta_ws/src

cd ~/zeta_ws/src
git clone https://github.com/zetabank-devteam/zeta2_edu_autonomous.git
cd ~/zeta_ws
colcon build --packages-select zeta2_navigation zeta2_slam_toolbox zeta2_cartographer
source ~/zeta_ws/install/setup.bash
Note
방금 만든 워크스페이스 소스 하는 법
우리가 만든 워크스페이스에서도 자동으로 소스를 할 수 있게 만들 수 있습니다.
PC의 터미널을 열고
echo "source  ~/zeta_ws/install/setup.bash" >> ~/.bashrc

source ~/.bashrc
이 명령어를 입력합니다.
한 번만 입력해 두면 다음부터 새로운 터미널을 열 때 마다 자동으로 소스가 진행 됩니다.
이제 필요한 패키지들은 설치가 완료 되었습니다.
2 slam tool box 매핑
먼저 로봇에 접속해 zeta2_bringup 을 실행합니다.
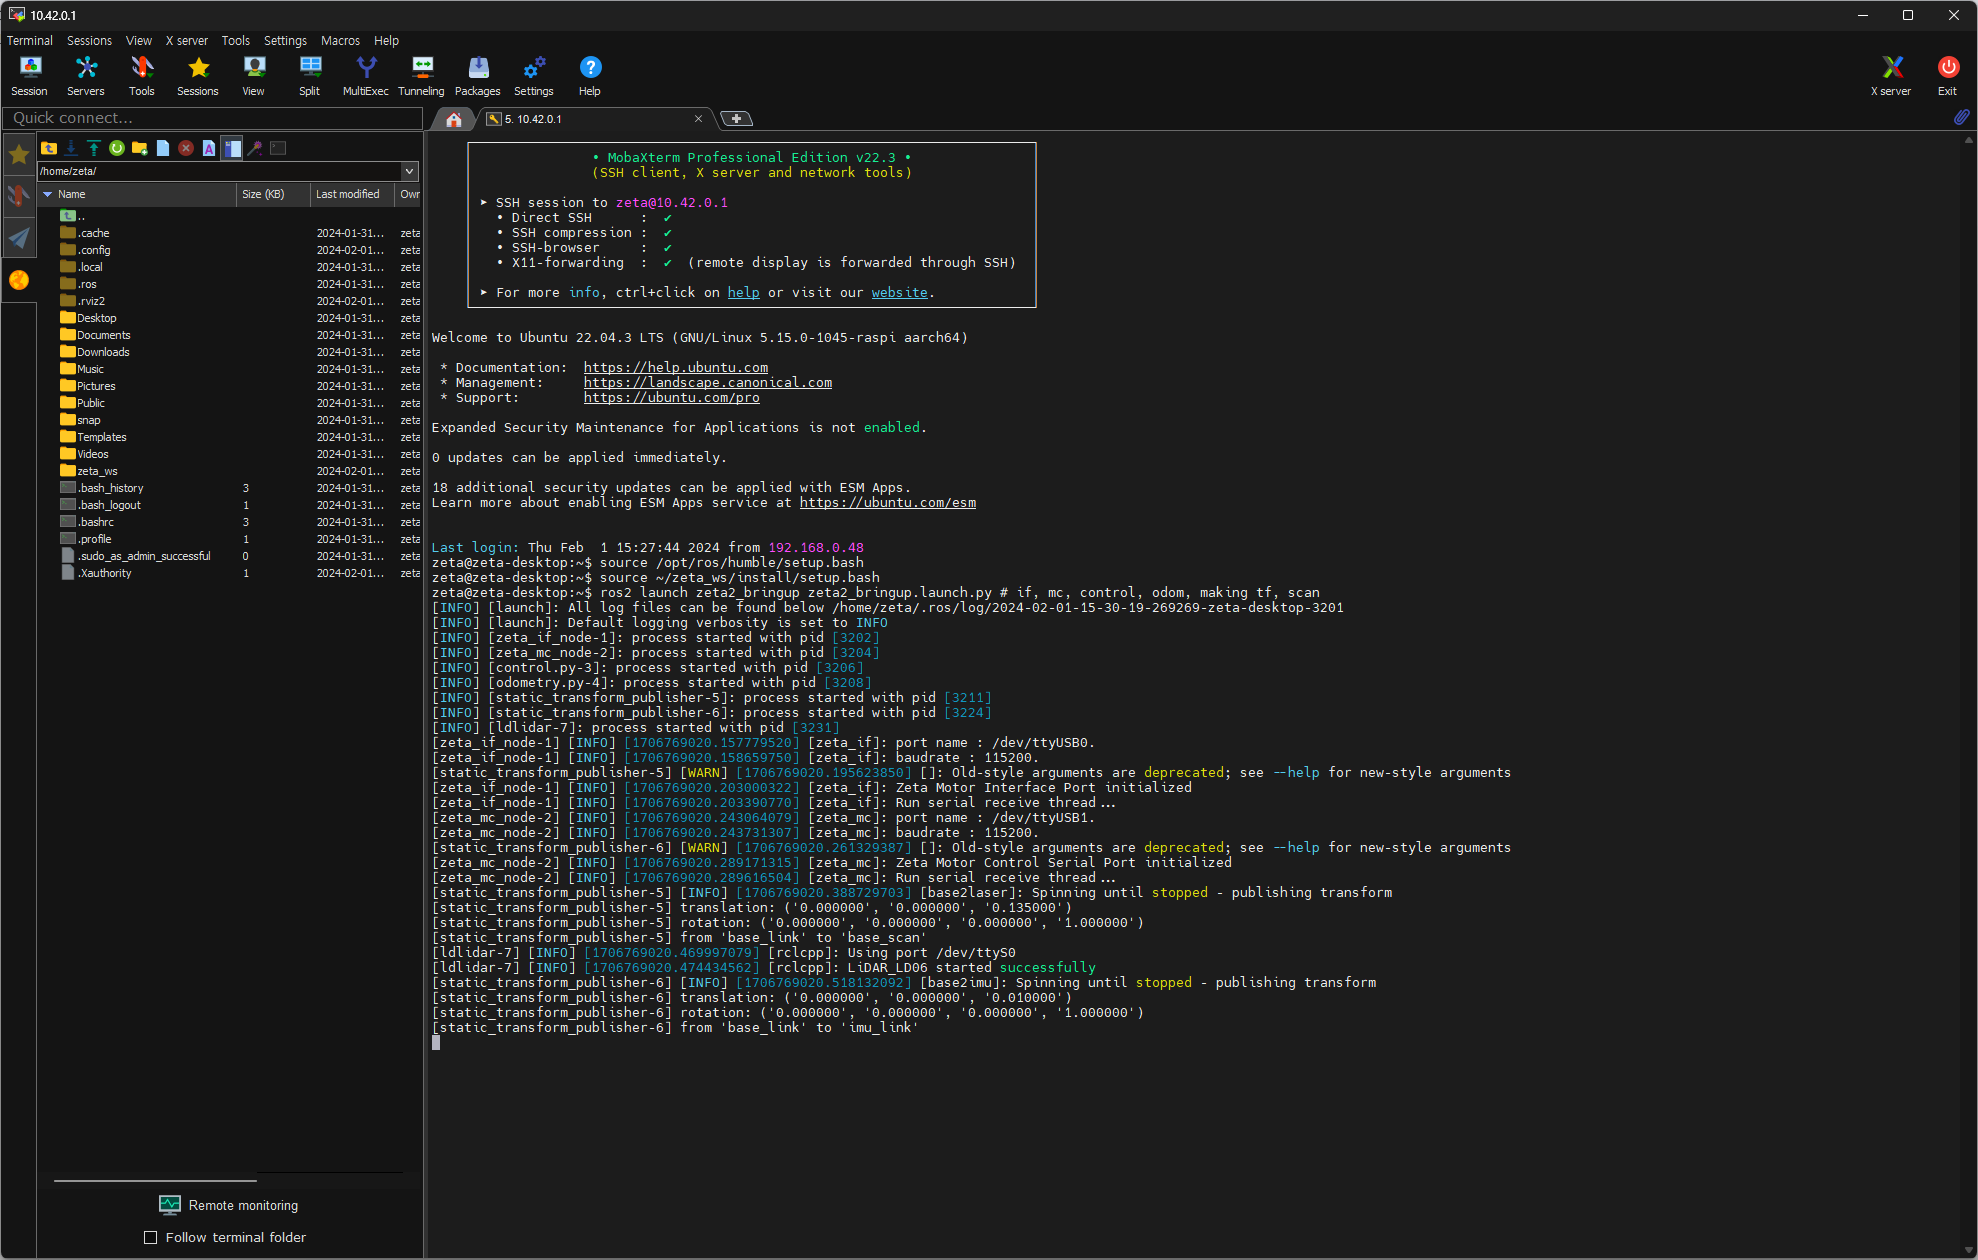
ssh zeta@{ROBOT_IP}

ros2 launch zeta2_bringup zeta2_bringup.launch.py # if, mc, control, odom, making tf, scan, joy
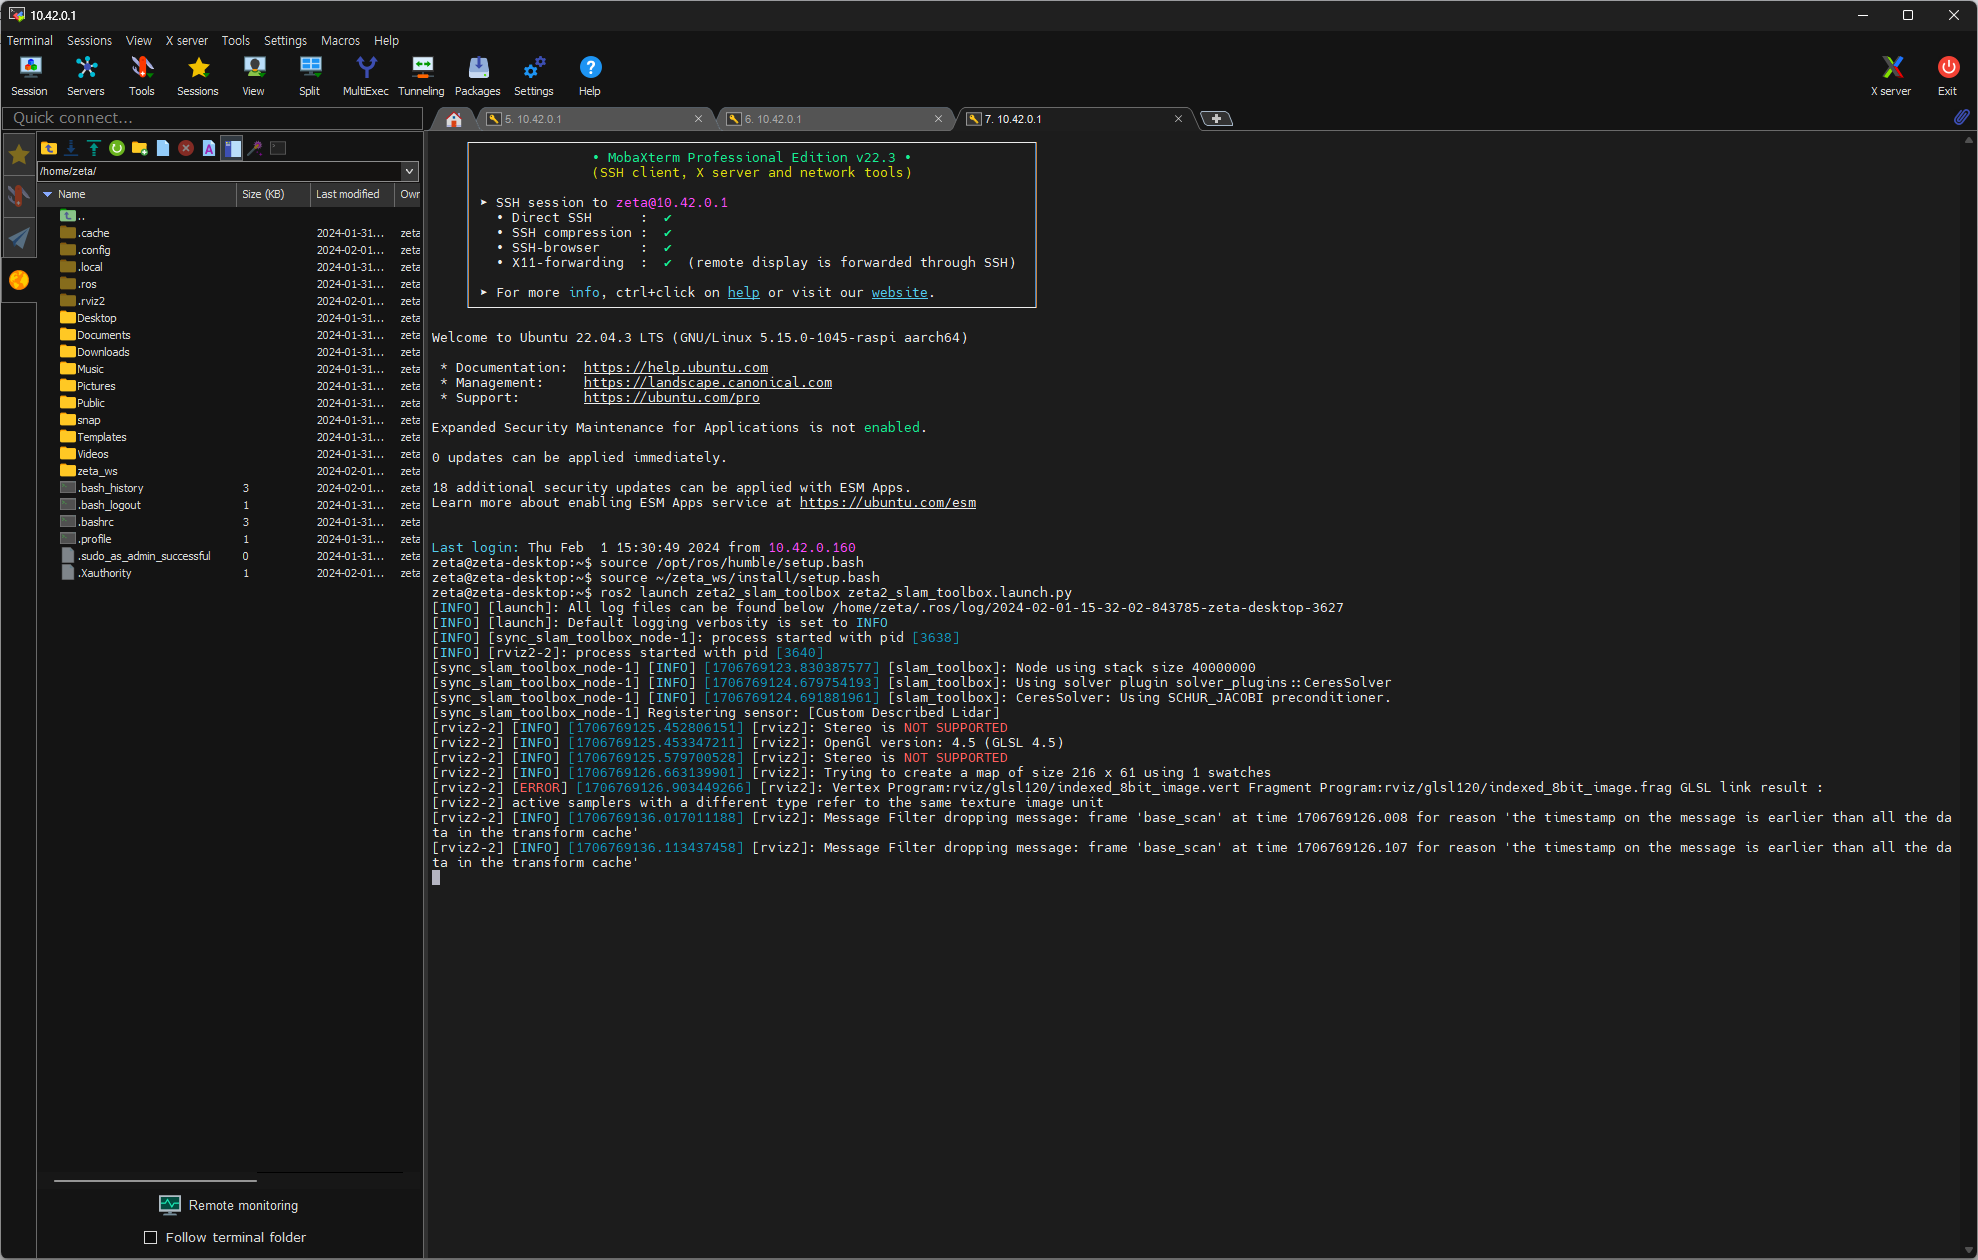
새로운 터미널을 열고 이번엔 로봇에 접속하지 않고 zeta_slam_toolbox를 실행한다. (zeta_ws 를 계속 source 해줘야 합니다.)
source ~/zeta_ws/install/setup.bash

ros2 launch zeta2_slam_toolbox zeta2_slam_toolbox.launch.py
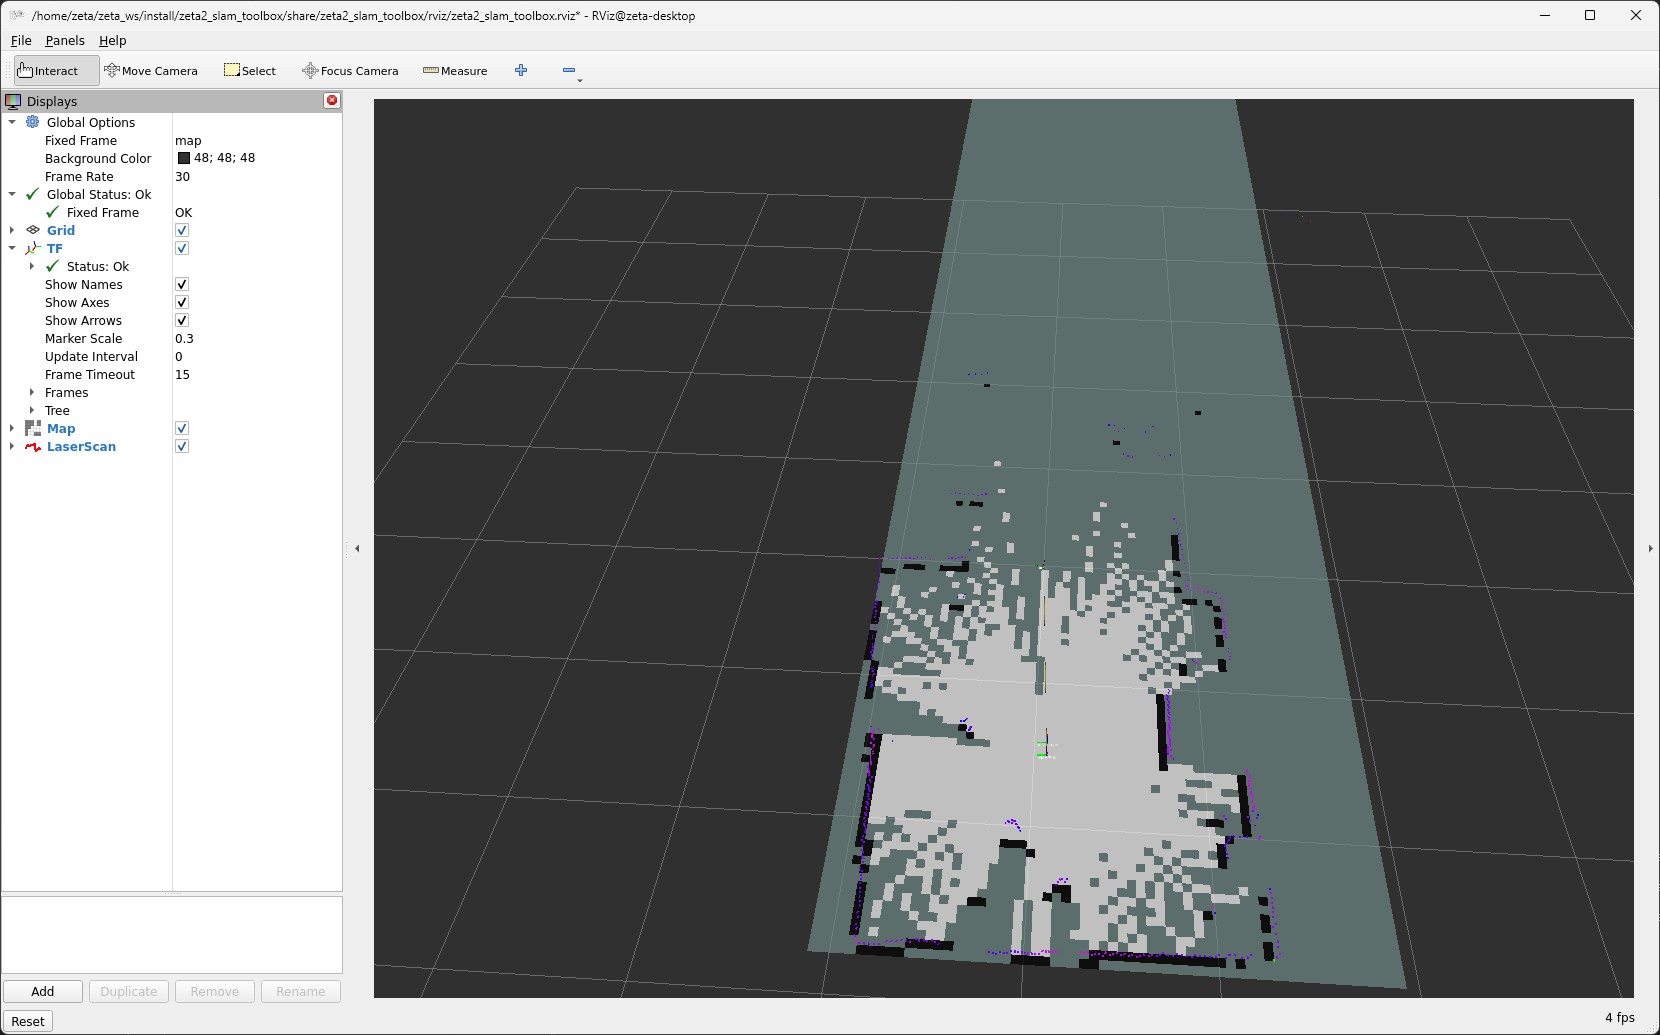
조이스틱으로 조작하며 맵을 확장해나간다.
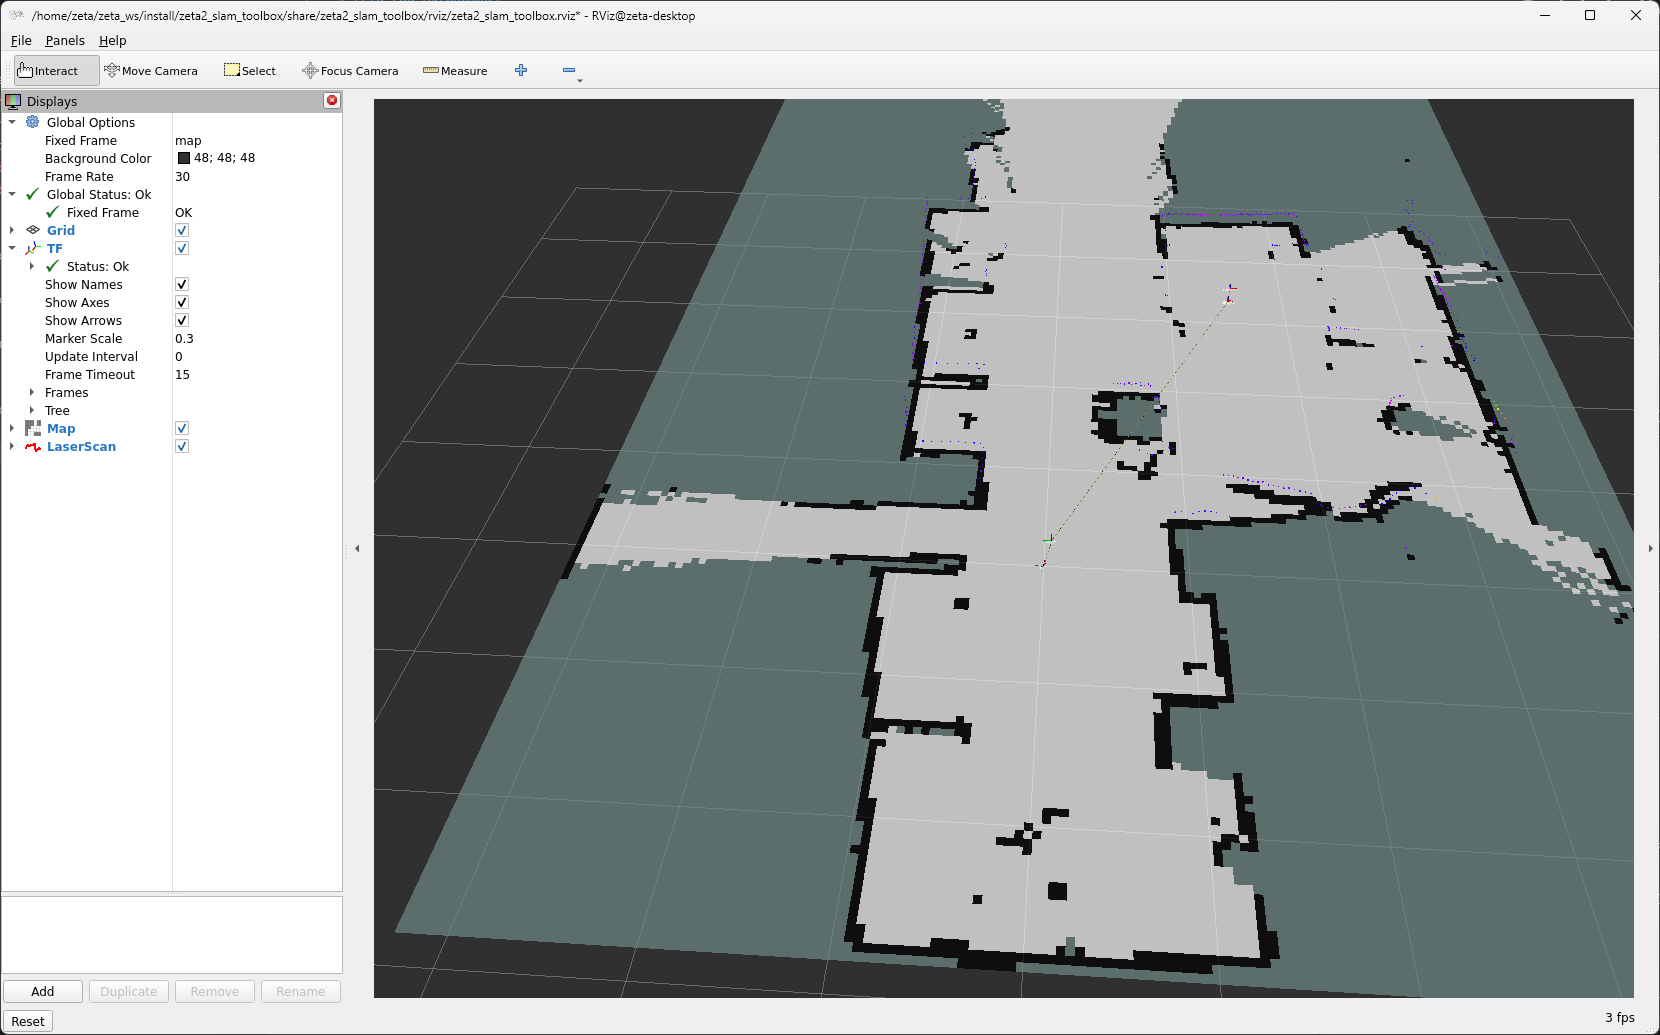
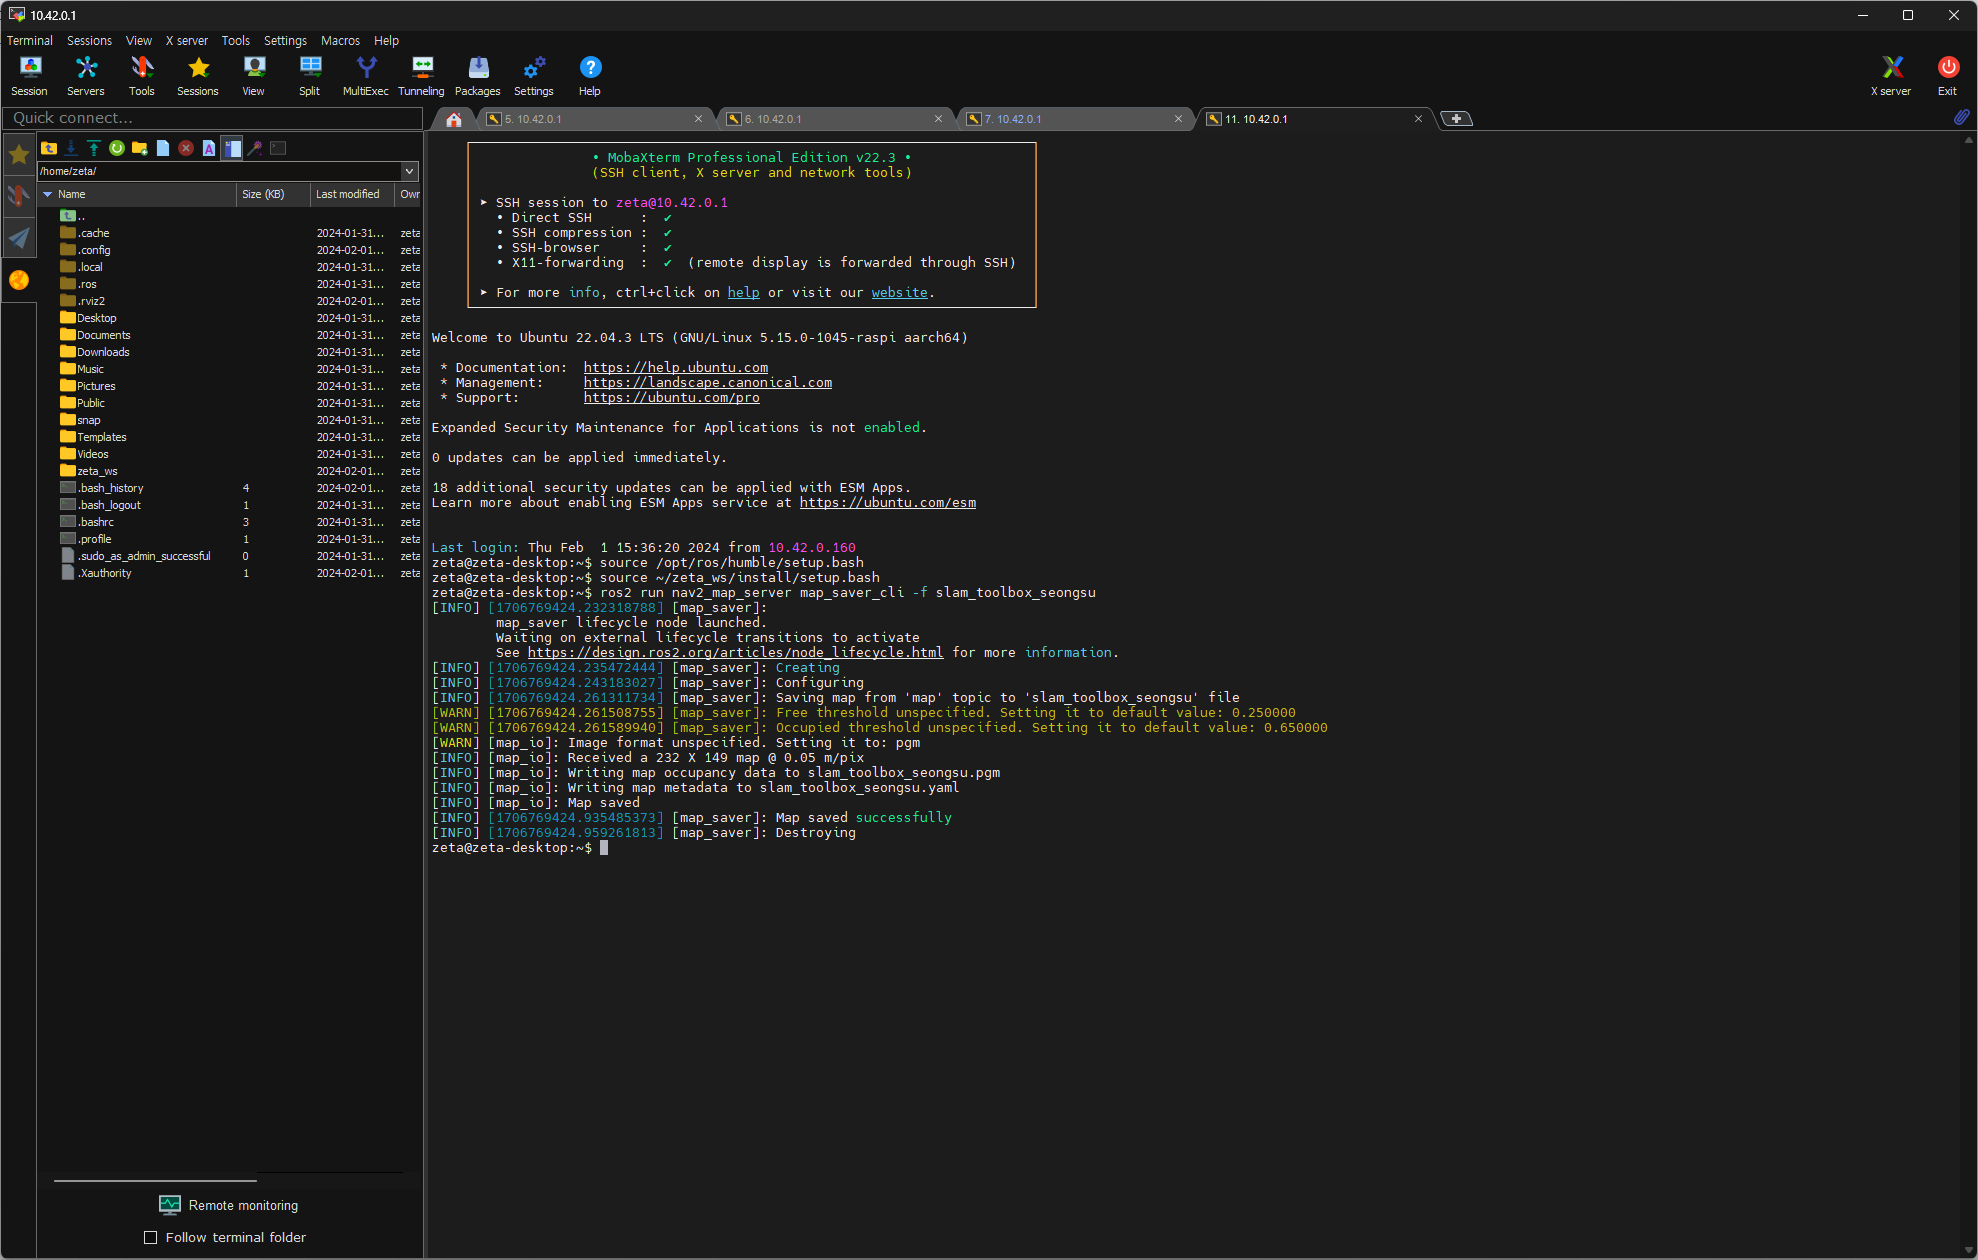
rviz 화면을 보고 지도를 다 그리면 지도를 저장한다. ‘Map saved successfully’가 나오면 성공
## ros2 run nav2_map_server map_saver_cli -f {원하는 지도 이름}
## 예시

ros2 run nav2_map_server map_saver_cli -f slam_toolbox_seongsu
Note
실패가 나오더라도 당황하지 않고 다시 실행하면 저장 된다.
# 1차 시도

ros2 run nav2_map_server map_saver_cli -f office

[INFO] [1707357911.897409677] [map_saver]:
      map_saver lifecycle node launched.
      Waiting on external lifecycle transitions to activate
      See https://design.ros2.org/articles/node_lifecycle.html for more information.
[INFO] [1707357911.897945562] [map_saver]: Creating
[INFO] [1707357911.898317319] [map_saver]: Configuring
[INFO] [1707357911.912723324] [map_saver]: Saving map from 'map' topic to 'office' file
[WARN] [1707357911.913061451] [map_saver]: Free threshold unspecified. Setting it to default value: 0.250000
[WARN] [1707357911.913144432] [map_saver]: Occupied threshold unspecified. Setting it to default value: 0.650000
[ERROR] [1707357913.919701158] [map_saver]: Failed to spin map subscription
[INFO] [1707357913.925887446] [map_saver]: Destroying
[ros2run]: Process exited with failure 1

# 2차 시도

ros2 run nav2_map_server map_saver_cli -f office

[INFO] [1707357917.178735050] [map_saver]:
      map_saver lifecycle node launched.
      Waiting on external lifecycle transitions to activate
      See https://design.ros2.org/articles/node_lifecycle.html for more information.
[INFO] [1707357917.180127725] [map_saver]: Creating
[INFO] [1707357917.181631380] [map_saver]: Configuring
[INFO] [1707357917.192101730] [map_saver]: Saving map from 'map' topic to 'office' file
[WARN] [1707357917.192336839] [map_saver]: Free threshold unspecified. Setting it to default value: 0.250000
[WARN] [1707357917.192414894] [map_saver]: Occupied threshold unspecified. Setting it to default value: 0.650000
[WARN] [map_io]: Image format unspecified. Setting it to: pgm
[INFO] [map_io]: Received a 245 X 162 map @ 0.05 m/pix
[INFO] [map_io]: Writing map occupancy data to office.pgm
[INFO] [map_io]: Writing map metadata to office.yaml
[INFO] [map_io]: Map saved
[INFO] [1707357917.726928492] [map_saver]: Map saved successfully
[INFO] [1707357917.732879393] [map_saver]: Destroying
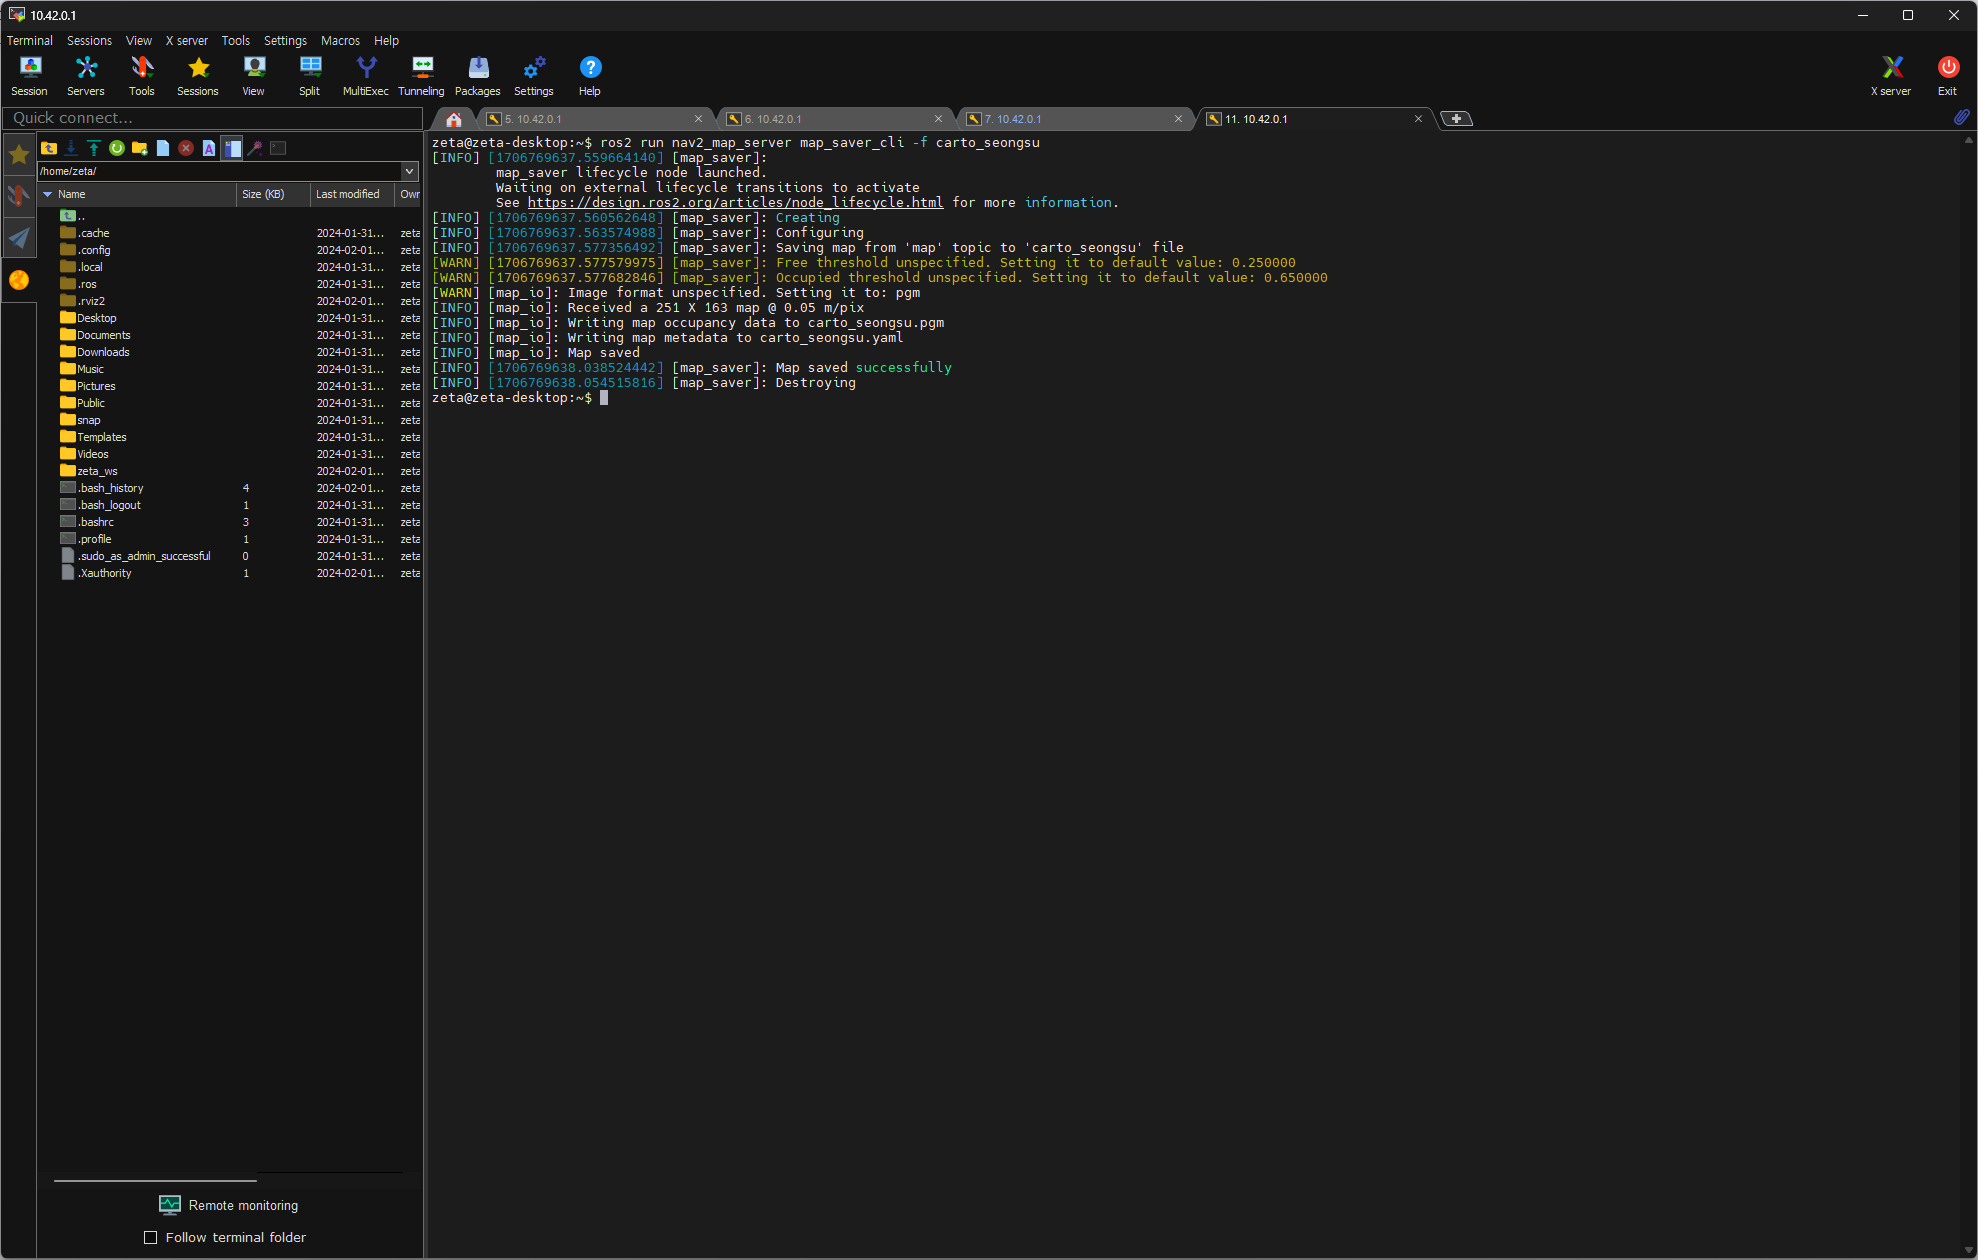
3 cartographer 매핑
먼저 로봇에 접속해 zeta2_bringup 을 실행합니다.
ssh zeta@{ROBOT_IP}

ros2 launch zeta2_bringup zeta2_bringup.launch.py # if, mc, control, odom, making tf, scan, joy
새로운 터미널을 열고 이번엔 로봇에 접속하지 않고 zeta_cartographer를 실행한다.
ros2 launch zeta2_cartographer zeta2_cartographer.launch.py
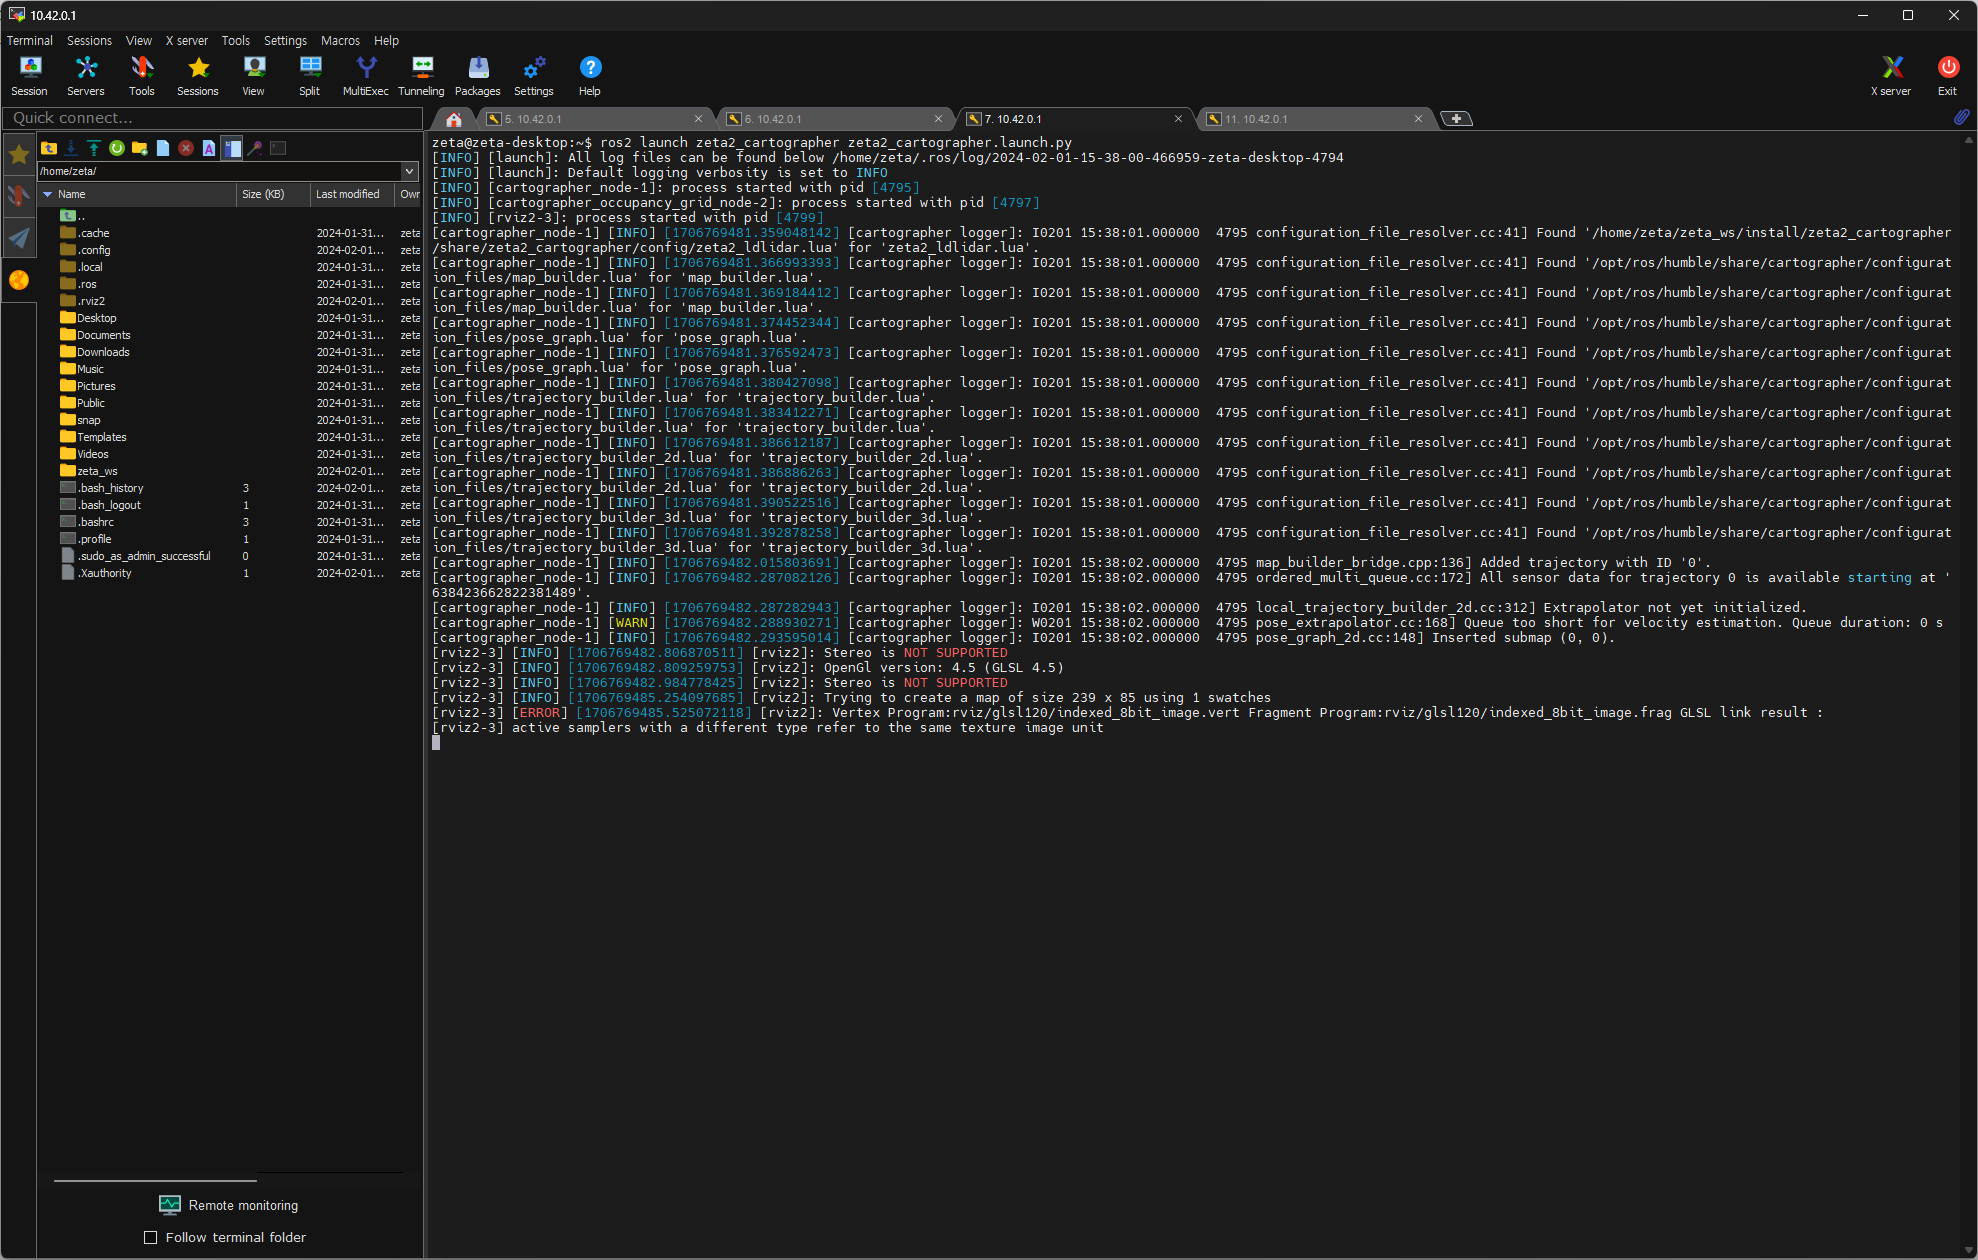
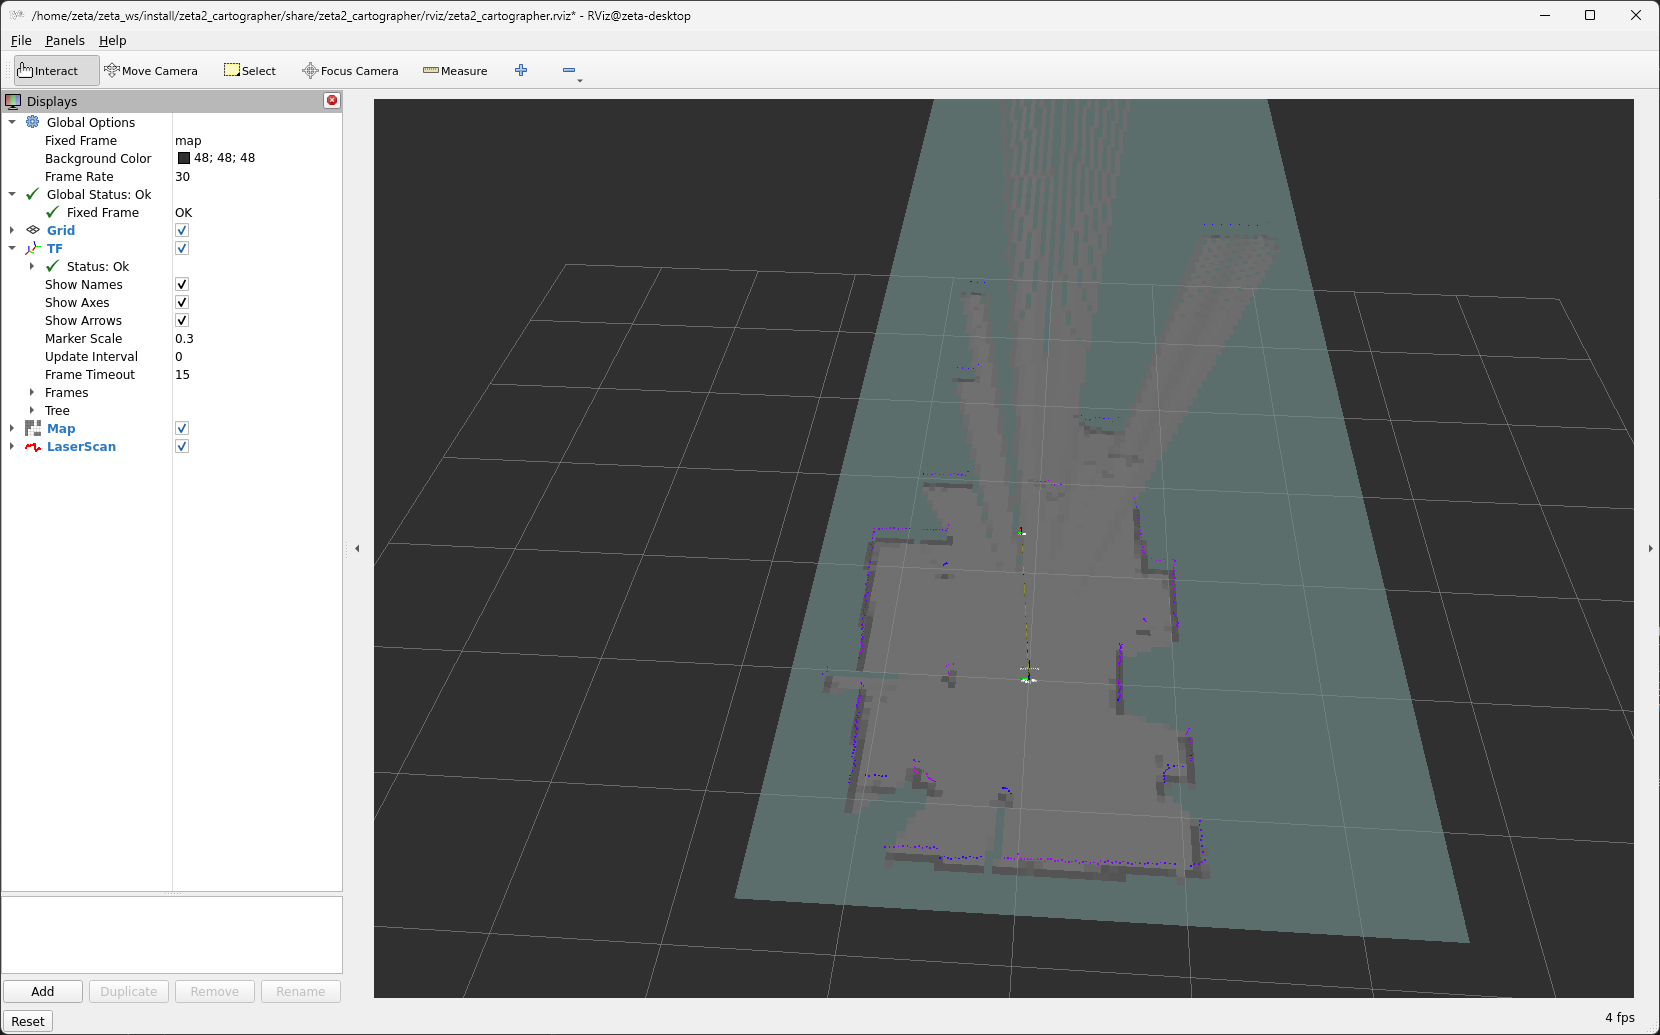
조이스틱으로 조작하며 맵을 확장해나간다.
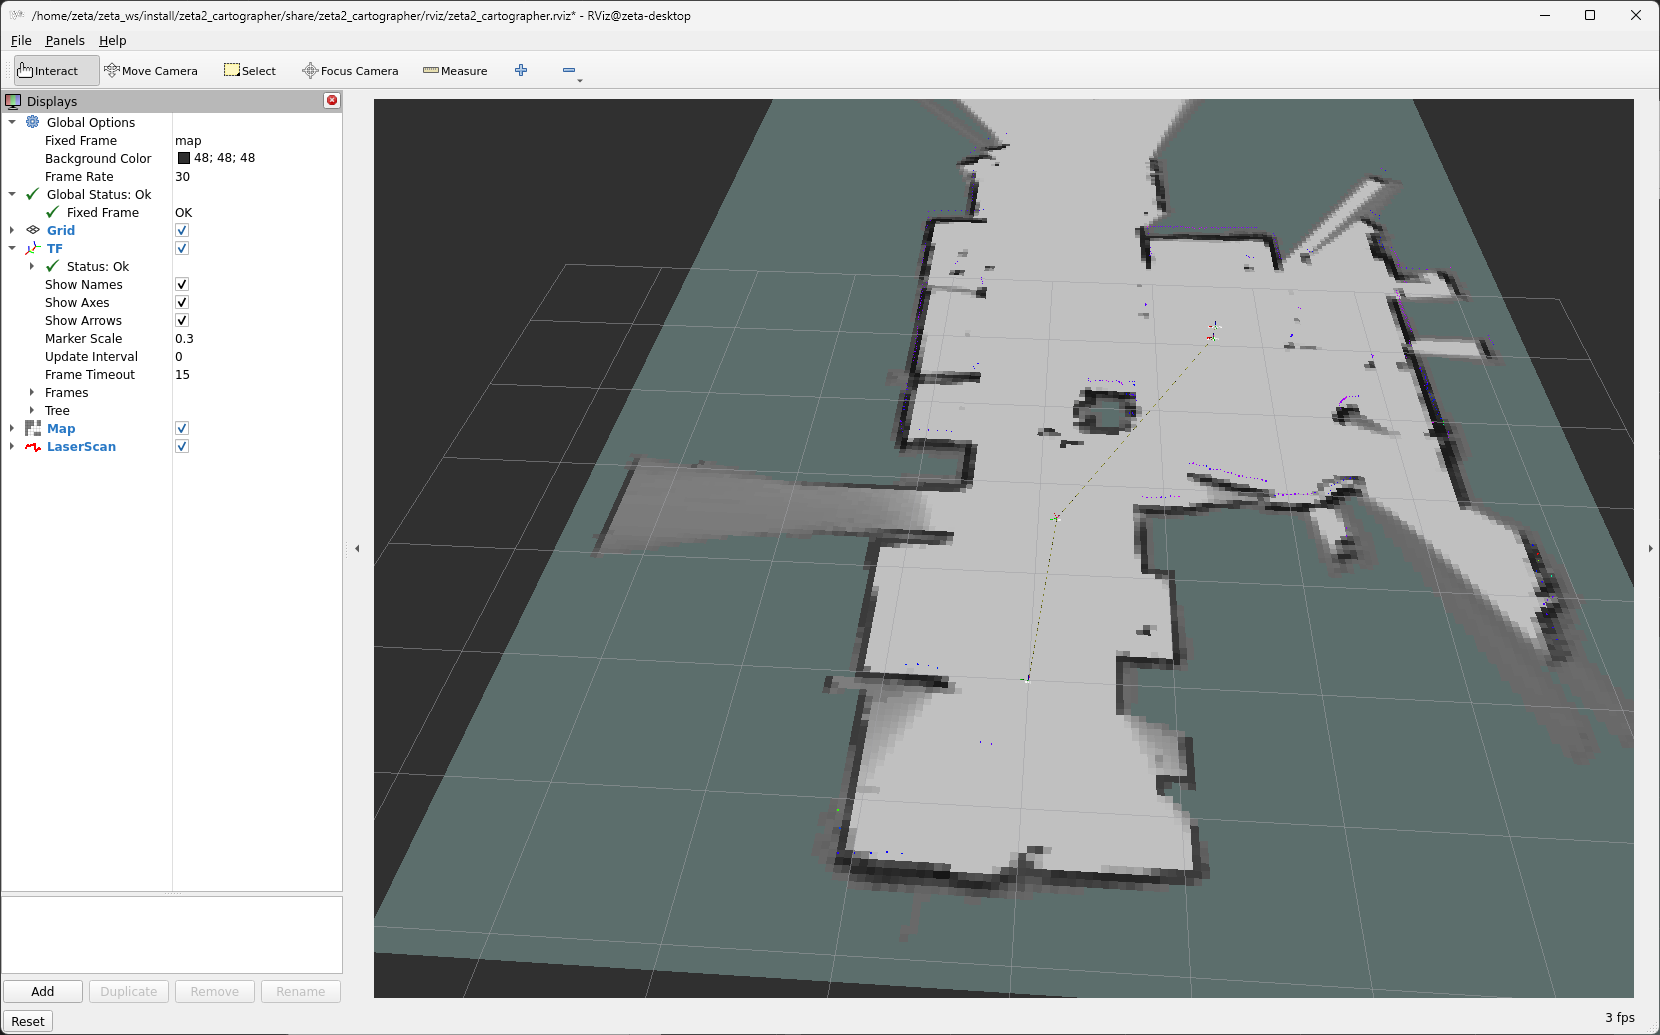
rviz 화면을 보고 지도를 다 그리면 지도를 저장한다. ‘Map saved successfully’가 나오면 성공
## ros2 run nav2_map_server map_saver_cli -f {원하는 지도 이름}
## 예시
ros2 run nav2_map_server map_saver_cli -f carto_seongsu
4 navigation2 실행
이 부분은 이제 로봇을 자율주행 하는 부분 입니다. 이 로봇은 DWBLocalPlanner 를 사용하여 주행합니다.
앞의 slam_toolbox 나 cartographer 과정을 완료 했으면 지도를 만들 수 있었을 것입니다.
그 지도를 사용하여 자율주행을 해볼 것 입니다.
Note
2.1 로봇 별 설정
로봇의 크기에 따라서 설정할 것들이 생깁니다.
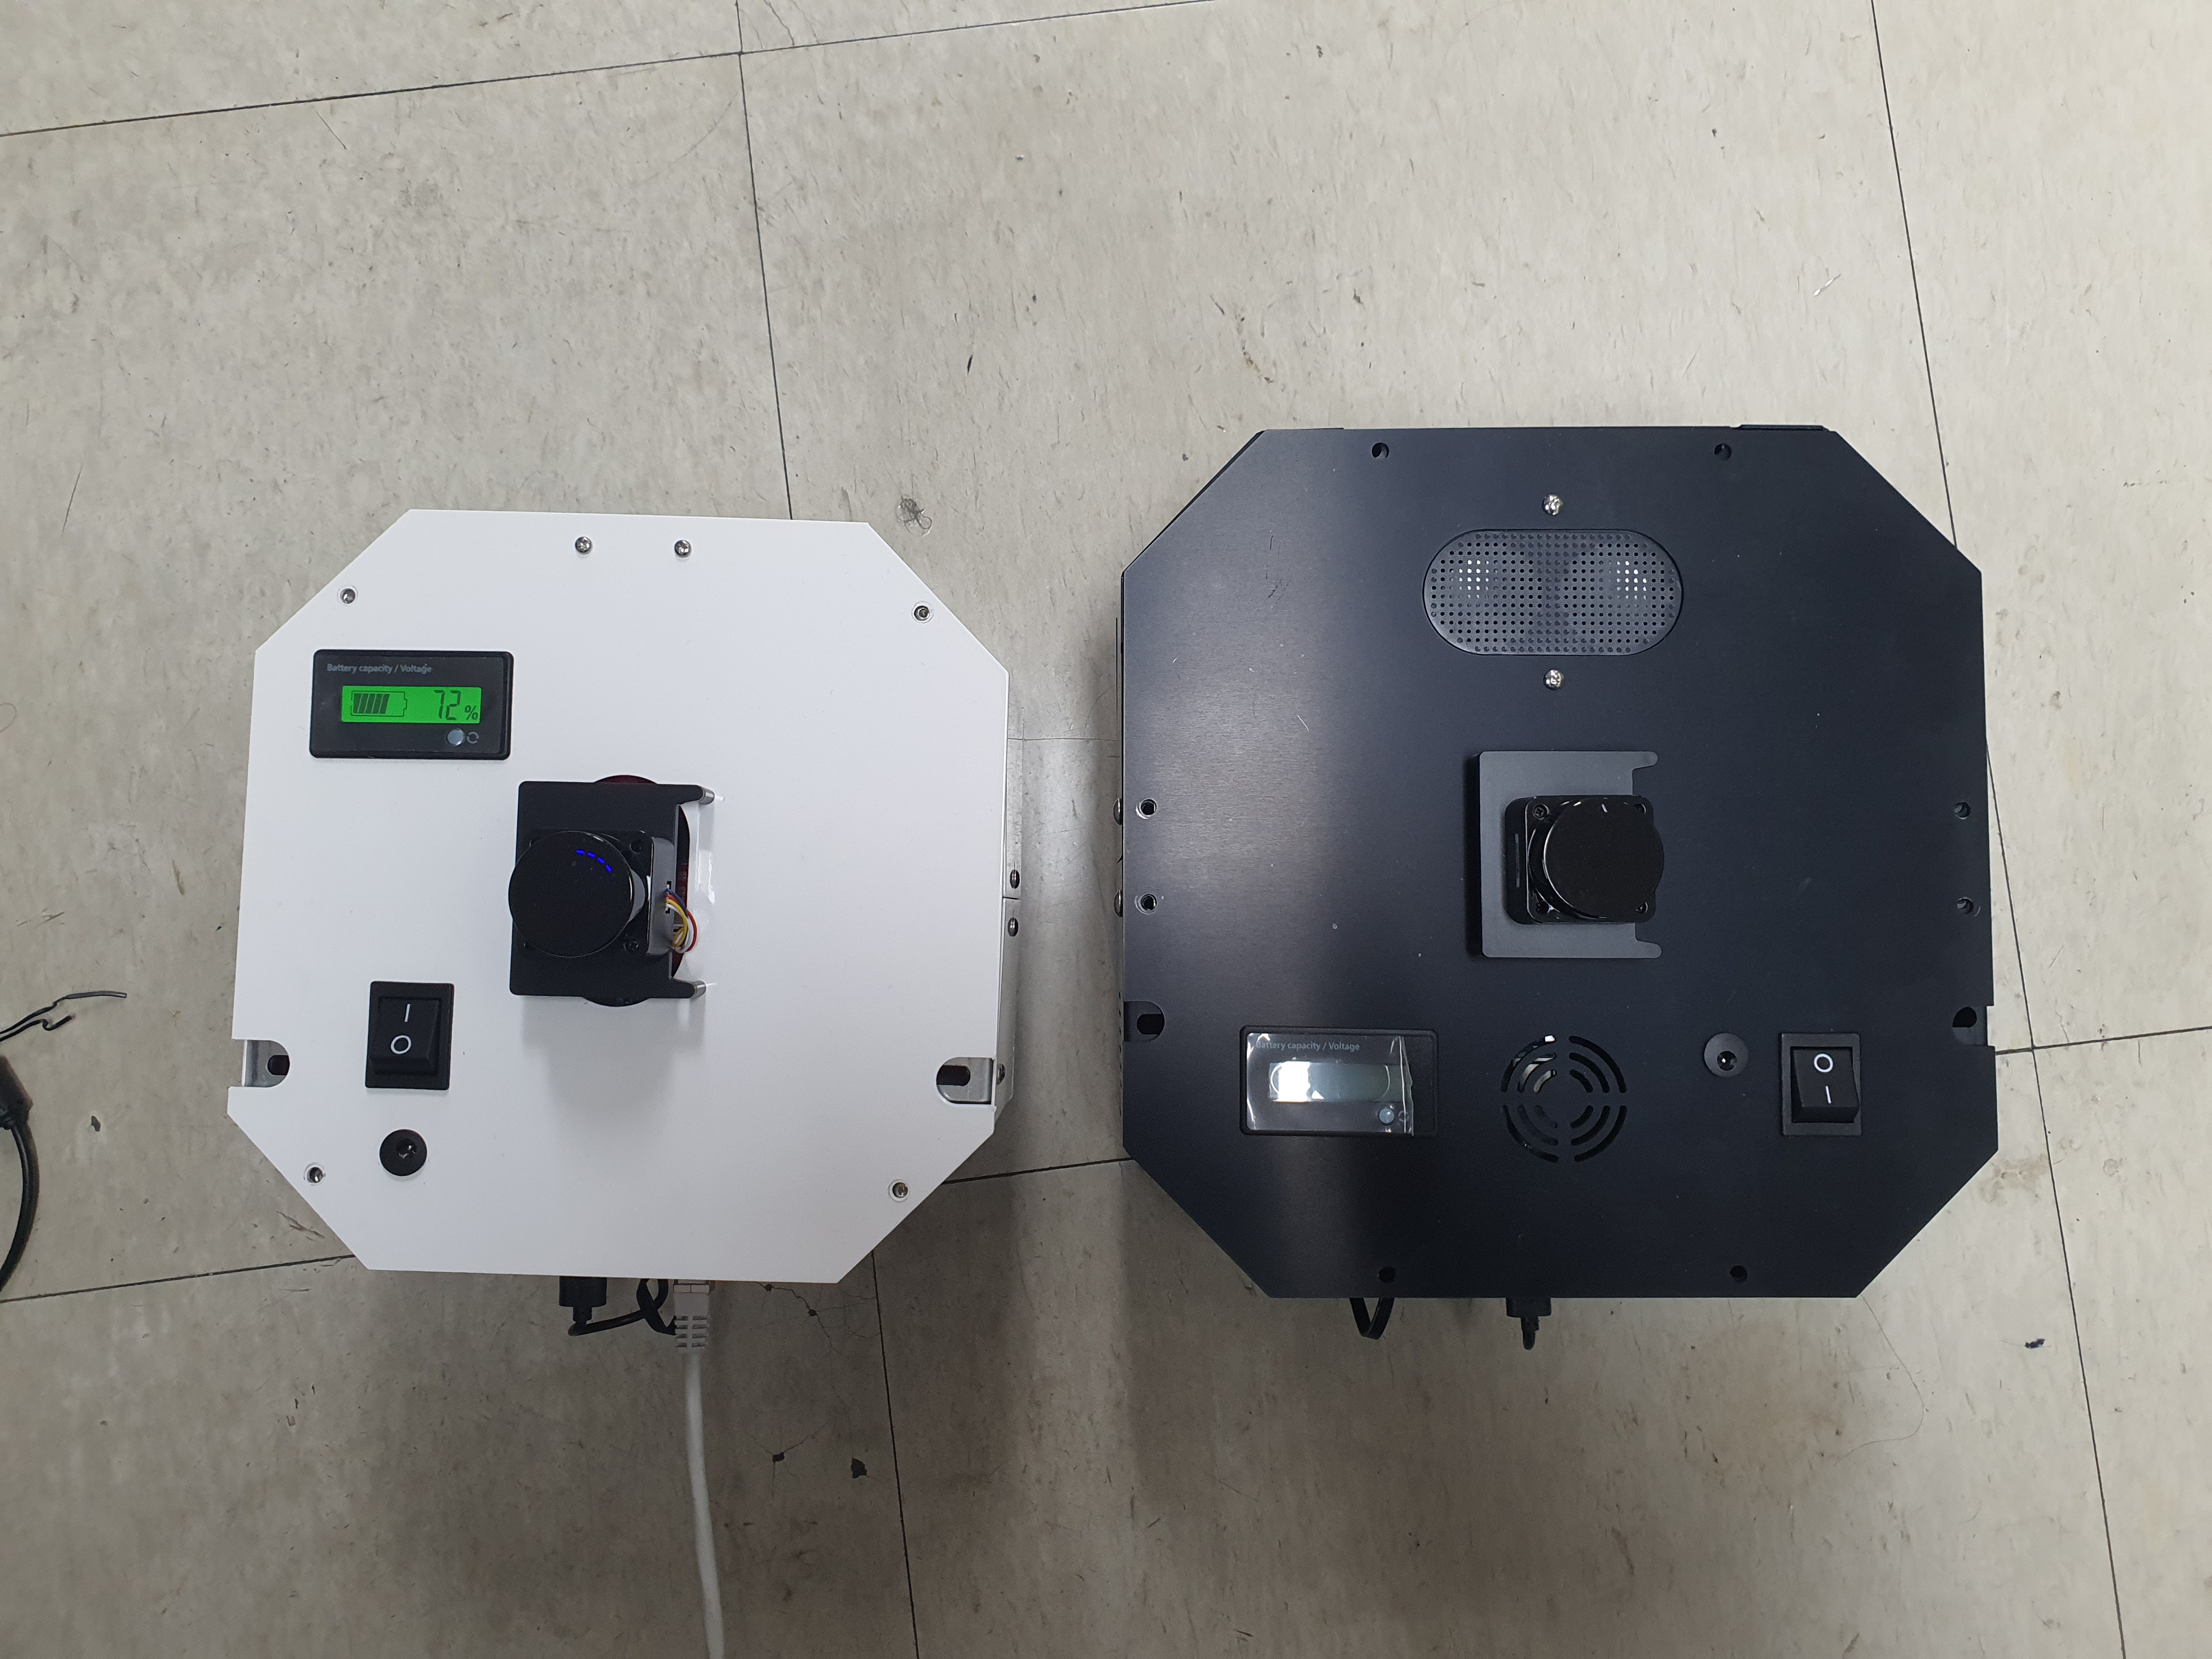
왼쪽의 작은 로봇이 있고, 오른쪽의 조금 더 큰 로봇이 있습니다.
지금 이 패키지는 조금 더 큰 로봇을 기준으로 완성 된 것입니다.
그렇기에 작은 로봇을 사용할 경우엔 수정사항이 생깁니다.
큰 로봇일 경우엔 스킵해도 됩니다.
2.1.1 zeta_dwb.yaml 수정
자율주행을 할 때 이 zeta_dwb.yaml 파일을 읽어서 파라미터들을 불러옵니다.
이 값들 중에서 robot_radius 라는 값들이 있는데 이는 로봇의 반지름을 나타냅니다.
실제 로봇의 모양은 원형이 아니지만 원이라 가정하고 로봇의 반경을 설정해 주는 부분입니다.
좀 더 구체적인 형태로 나타내고 싶을 땐 footprint 를 사용할 수 있습니다.
하지만 모양이 구체적일 수록 계산량이 늘어나서 지금 이 환경에선 추천하지 않습니다.
자세한 정보는 costmap 을 참고 하시기 바랍니다.
작은 로봇의 경우는 가장 끝에서 끝의 경우에 약 28cm 정도이기 때문에 0.16 -> 0.14 로 수정해 주시면 됩니다.
cd ~/zeta_ws/src/zeta2_edu_autonomous/zeta2_navigation/params

gedit zeta_dwb.yaml

-------
.
.
.
# 약 185번째 줄
robot_radius: 0.16 -> robot_radius: 0.14
.
.
.
# 약 211번째 줄
robot_radius: 0.16 -> robot_radius: 0.14
-------
이 두 부분을 수정해 주시면 됩니다.
기존의 큰 로봇을 사용할 경우엔 생략하셔도 됩니다.
만들었던 맵을 zeta2_navigation/maps 폴더에 잘 넣는다. (맵은 pgm 파일과 yaml 파일 두개 다 필요하다.)
넣을 땐 구분하기 좋게 폴더 명을 만들어서 넣는게 좋다.
zeta@zeta-desktop:~$ ls
Desktop    Downloads  office.pgm   Pictures  snap       Videos
Documents  Music      office.yaml  Public    Templates  zeta_ws
지금 경우엔 office라는 맵을 만들었었다.
cd ~/zeta_ws/src/zeta2_edu_autonomous/zeta2_navigation/maps/
mkdir office

cd ~

cp office* ~/zeta_ws/src/zeta2_edu_autonomous/zeta2_navigation/maps/office
이런 명령어를 통해 복사 할 수 있다.
맵을 다 넣었다면 zeta2_navigation 패키지의 launch 파일을 수정해줘야 한다. 지금은 기본으로 설정된 맵으로 지정 되어 있을 것이다.
cd ~/zeta_ws/src/zeta2_edu_autonomous/zeta2_navigation/launch

gedit zeta2_navigation.launch.py

# 중간 쯤에 이렇게 되어 있는 곳이 있을 것이다. office 자리엔 본인이 생성한 폴더 이름 office.yaml 자리엔 본인의 yaml 파일 이름을 넣으면 된다.
----------
    map_dir = LaunchConfiguration(
     'map',
     default=os.path.join(
         zeta2_nav2_dir,
         'maps',
         'office',
         'office.yaml'))
----------
cd ~/zeta_ws
colcon build --packages-select zeta2_navigation
zeta2_navigation 을 실행 할 땐 로봇의 zeta2_bringup 이 실행 되고 있어야 한다.
로봇에 ssh 접속하고 bringup 실행
ssh zeta@{ROBOT_IP}

source ~/zeta_ws/install/setup.bash
ros2 launch zeta2_bringup zeta2_bringup.launch.py
zeta2_navigation 패키지의 zeta2_navigation 런치 파일을 실행한다.
source ~/zeta_ws/install/setup.bash
ros2 launch zeta2_navigation zeta2_navigation.launch.py
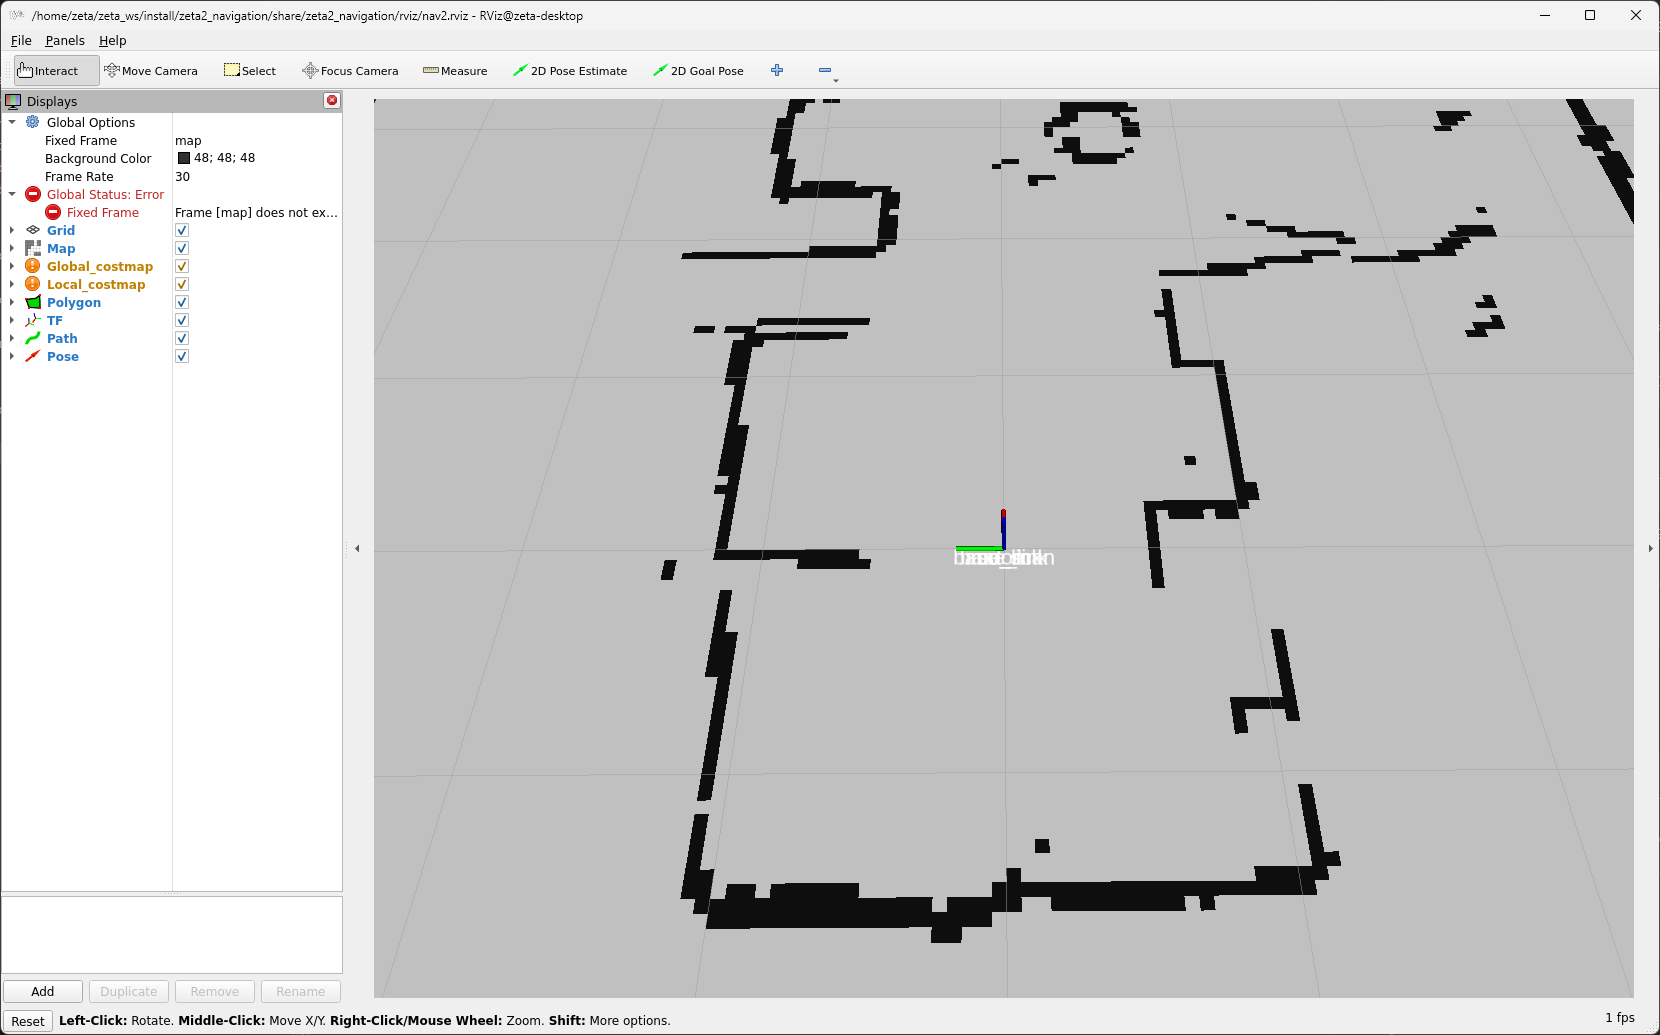
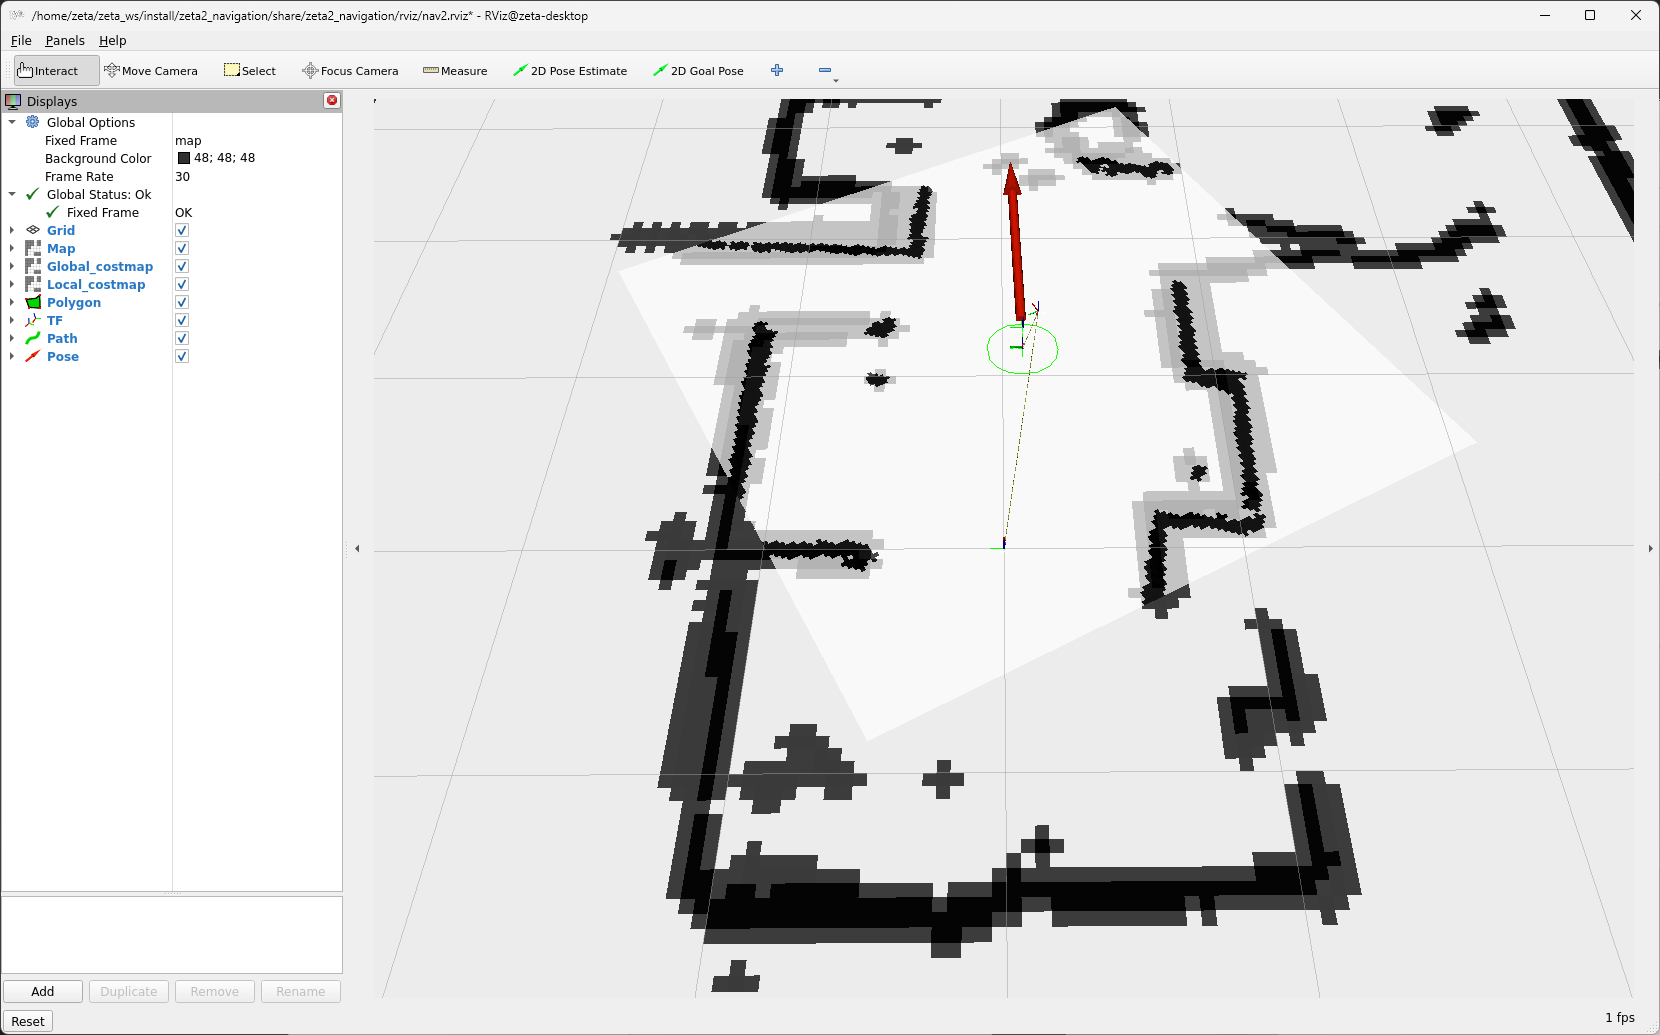
로봇의 초기 위치를 세팅한다. 2D Pose Estimate를 클릭하고 초기 위치와 방향에 맞춰 드래그 한다.
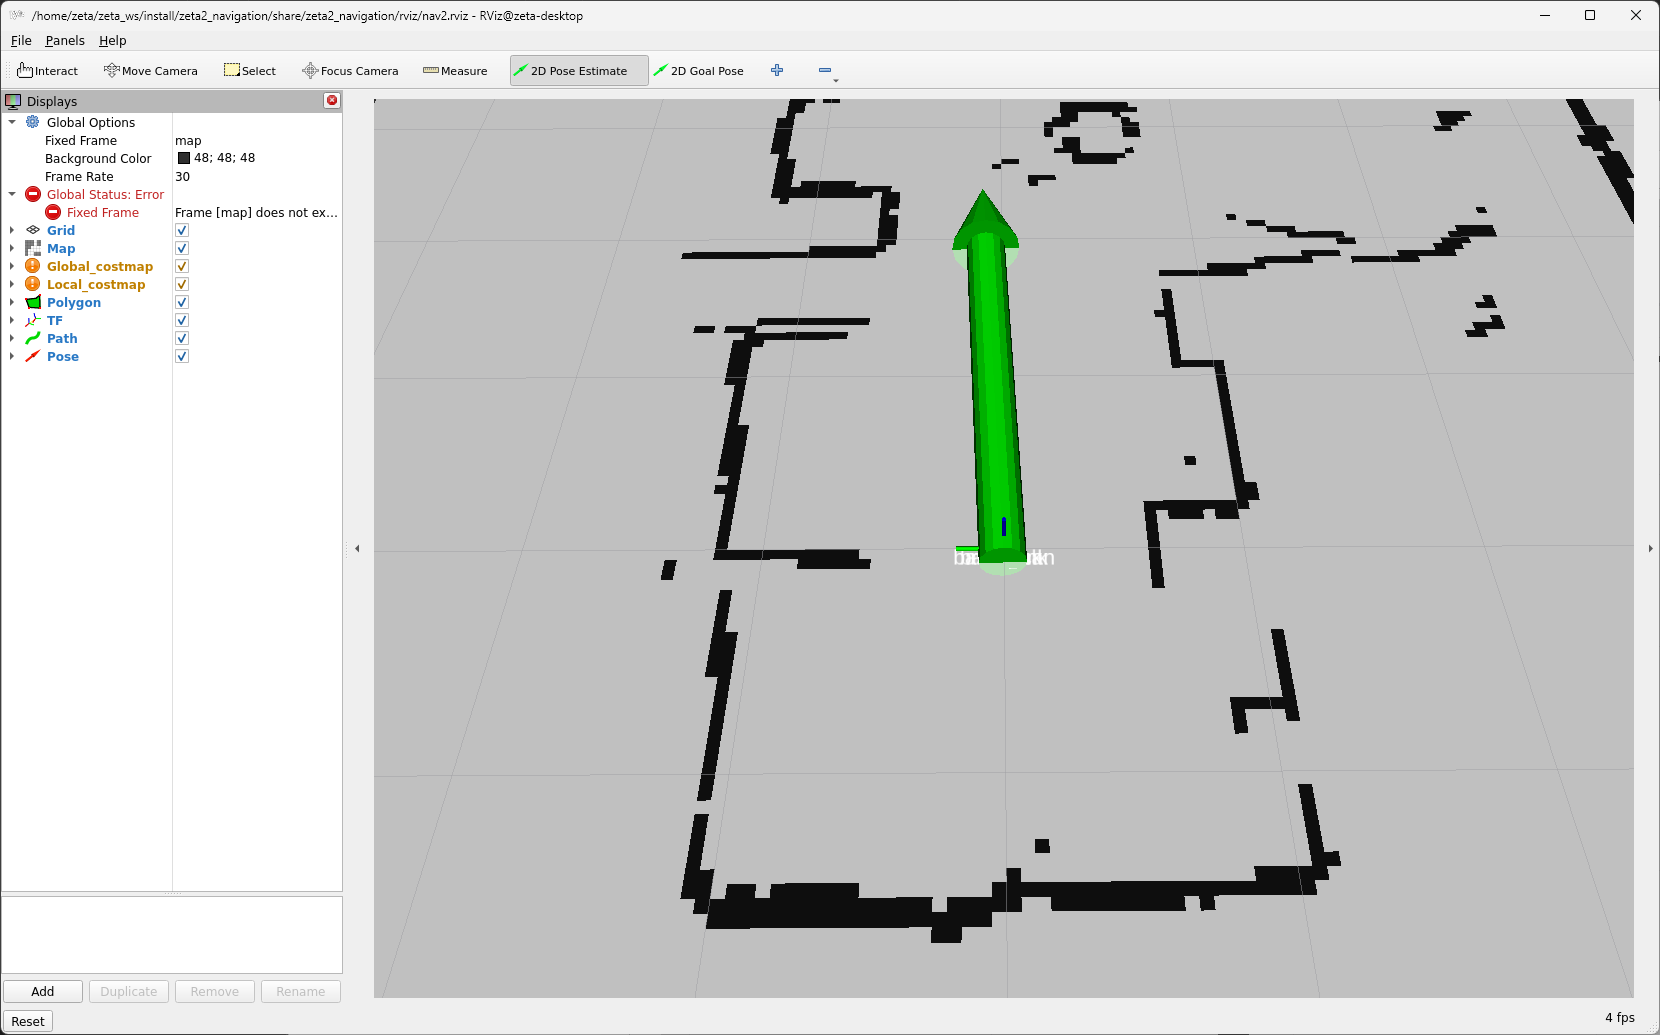
2D Goas Pose를 클릭하고 원하는 위치 방향에 맞춰 드래그 하면 로봇이 움직인다.
요약
slam toolbox 와 cartographer 를 사용하여 매핑 하는 법을 배웠습니다.
navigation2 를 사용하여 자율주행 하는 법을 배웠습니다.
구체적이고 자세한 설명은 각각의 패키지들에 대한 설명사이트를 참고하시길 바랍니다.(slam_toolbox, cartographer, navigation2)
다음 단계
다음 과정에선 자율주행할 때 사용한 파라미터들에 대해서 알아보겠습니다.