브로드캐스터 작성하기 (Python)
목표: 로봇의 상태를 tf2에 브로드캐스트하는 방법을 배웁니다.
배경
다음 두 개의 튜토리얼에서는 tf2 소개 튜토리얼 에서 소개한 데모를 복제하기 위한 코드를 작성합니다. 이후의 튜토리얼에서는 변환 조회 및 시간 여행과 같은 더 고급 tf2 기능을 사용하여 데모를 확장하는 데 중점을 둡니다.
필수 준비 사항
이 튜토리얼은 ROS 2에 대한 작업 지식과 이전에 작성한 tf2 소개 튜토리얼 및 tf2 정적 브로드캐스터 튜토리얼 (Python) 을 완료한 것으로 가정합니다.
우리는 마지막 튜토리얼에서 만든 learning_tf2_py 패키지를 다시 사용할 것입니다.
또한 이전 튜토리얼에서는 작업 공간을 생성하는 방법 과 패키지를 생성하는 방법 을 배웠습니다.
작업
1 브로드캐스터 노드 작성
먼저 소스 파일을 작성합니다.
이전 튜토리얼에서 생성한 learning_tf2_py 패키지로 이동하세요.
src/learning_tf2_py/learning_tf2_py 디렉토리에서 다음 명령을 입력하여 예제 브로드캐스터 코드를 다운로드합니다.
wget https://raw.githubusercontent.com/ros/geometry_tutorials/ros2/turtle_tf2_py/turtle_tf2_py/turtle_tf2_broadcaster.py
선호하는 텍스트 편집기를 사용하여 파일을 엽니다.
import math

from geometry_msgs.msg import TransformStamped

import numpy as np

import rclpy
from rclpy.node import Node

from tf2_ros import TransformBroadcaster

from turtlesim.msg import Pose


def quaternion_from_euler(ai, aj, ak):
   ai /= 2.0
   aj /= 2.0
   ak /= 2.0
   ci = math.cos(ai)
   si = math.sin(ai)
   cj = math.cos(aj)
   sj = math.sin(aj)
   ck = math.cos(ak)
   sk = math.sin(ak)
   cc = ci*ck
   cs = ci*sk
   sc = si*ck
   ss = si*sk

   q = np.empty((4, ))
   q[0] = cj*sc - sj*cs
   q[1] = cj*ss + sj*cc
   q[2] = cj*cs - sj*sc
   q[3] = cj*cc + sj*ss

   return q


class FramePublisher(Node):

   def __init__(self):
      super().__init__('turtle_tf2_frame_publisher')

      # Declare and acquire `turtlename` parameter
      self.turtlename = self.declare_parameter(
         'turtlename', 'turtle').get_parameter_value().string_value

      # Initialize the transform broadcaster
      self.tf_broadcaster = TransformBroadcaster(self)

      # Subscribe to a turtle{1}{2}/pose topic and call handle_turtle_pose
      # callback function on each message
      self.subscription = self.create_subscription(
            Pose,
            f'/{self.turtlename}/pose',
            self.handle_turtle_pose,
            1)
      self.subscription  # prevent unused variable warning

   def handle_turtle_pose(self, msg):
      t = TransformStamped()

      # Read message content and assign it to
      # corresponding tf variables
      t.header.stamp = self.get_clock().now().to_msg()
      t.header.frame_id = 'world'
      t.child_frame_id = self.turtlename

      # Turtle only exists in 2D, thus we get x and y translation
      # coordinates from the message and set the z coordinate to 0
      t.transform.translation.x = msg.x
      t.transform.translation.y = msg.y
      t.transform.translation.z = 0.0

      # For the same reason, turtle can only rotate around one axis
      # and this why we set rotation in x and y to 0 and obtain
      # rotation in z axis from the message
      q = quaternion_from_euler(0, 0, msg.theta)
      t.transform.rotation.x = q[0]
      t.transform.rotation.y = q[1]
      t.transform.rotation.z = q[2]
      t.transform.rotation.w = q[3]

      # Send the transformation
      self.tf_broadcaster.sendTransform(t)


def main():
   rclpy.init()
   node = FramePublisher()
   try:
      rclpy.spin(node)
   except KeyboardInterrupt:
      pass

   rclpy.shutdown()
1.1 코드 검토
이제 터틀 포즈를 tf2에 게시하는 데 관련된 코드를 살펴보겠습니다.
먼저 하나의 매개변수 turtlename 을 정의하고 얻습니다. 이 매개변수는 거북이 이름을 지정하는 데 사용됩니다. 예를 들어 turtle1 또는 turtle2 와 같습니다.
self.turtlename = self.declare_parameter(
  'turtlename', 'turtle').get_parameter_value().string_value
그런 다음 노드가 turtleX/pose 토픽을 구독하고 각 메시지에 대해 handle_turtle_pose 함수를 실행합니다.
self .subscription = self.create_subscription(
    Pose,
    f'/{self.turtlename}/pose',
    self.handle_turtle_pose,
    1)
이제 TransformStamped 객체를 만들고 적절한 메타데이터를 지정합니다.
게시되는 변환에 타임스탬프를 부여해야 하며, 현재 시간을
self.get_clock().now()라고 불러 현재 시간으로 스탬프를 찍을 것입니다. 그러면Node에서 사용하는 현재 시간이 반환됩니다.그런 다음 생성하려는 링크의 부모 프레임의 이름을 설정해야 합니다. 이 경우
world로 설정합니다.마지막으로 생성하려는 링크의 자식 노드의 이름을 설정해야 합니다. 이 경우 거북이 자체의 이름입니다.
거북이 포즈 메시지의 핸들러 함수는 이 거북이의 변환을 world 프레임에서 turtleX 프레임으로 변환하여 브로드캐스트합니다.
t = TransformStamped()

# Read message content and assign it to
# corresponding tf variables
t.header.stamp = self.get_clock().now().to_msg()
t.header.frame_id = 'world'
t.child_frame_id = self.turtlename
여기서 3D 거북이 포즈의 정보를 3D 변환으로 복사합니다.
# Turtle only exists in 2D, thus we get x and y translation
# coordinates from the message and set the z coordinate to 0
t.transform.translation.x = msg.x
t.transform.translation.y = msg.y
t.transform.translation.z = 0.0

# For the same reason, turtle can only rotate around one axis
# and this why we set rotation in x and y to 0 and obtain
# rotation in z axis from the message
q = quaternion_from_euler(0, 0, msg.theta)
t.transform.rotation.x = q[0]
t.transform.rotation.y = q[1]
t.transform.rotation.z = q[2]
t.transform.rotation.w = q[3]
마지막으로 구성한 변환을 TransformBroadcaster 의 sendTransform 메서드에 전달하여 브로드캐스트합니다.
# Send the transformation
self.tf_broadcaster.sendTransform(t)
1.2 진입 지점 추가
ros2 run 명령어를 사용하여 노드를 실행하려면 setup.py (src/learning_tf2_py 디렉토리에 위치함)에 진입 지점을 추가해야 합니다.
다음 라인을 'console_scripts': 섹션 사이에 추가하십시오.
'turtle_tf2_broadcaster = learning_tf2_py.turtle_tf2_broadcaster:main',
2 런치 파일 작성
이제 이 데모용 런치 파일을 작성합니다.
텍스트 편집기를 사용하여 launch 폴더에 turtle_tf2_demo.launch.py 라는 새 파일을 만들고 다음 라인을 추가합니다.
from launch import LaunchDescription
from launch_ros.actions import Node


def generate_launch_description():
    return LaunchDescription([
        Node(
            package='turtlesim',
            executable='turtlesim_node',
            name='sim'
        ),
        Node(
            package='learning_tf2_py',
            executable='turtle_tf2_broadcaster',
            name='broadcaster1',
            parameters=[
                {'turtlename': 'turtle1'}
            ]
        ),
    ])
2.1 코드 검토
먼저 launch 및 launch_ros 패키지에서 필요한 모듈을 가져옵니다.
launch 는 일반적인 시작 프레임워크이며(ROS 2와 관련이 없음), 여기에서 import 한 launch_ros 에는 ROS 2 특정 기능이 포함되어 있습니다.
from launch import LaunchDescription
from launch_ros.actions import Node
이제 turtlesim 시뮬레이션을 시작하는 노드를 실행하고 turtle_tf2_broadcaster 노드를 사용하여 turtle1 상태를 tf2로 방송합니다.
Node(
    package='turtlesim',
    executable='turtlesim_node',
    name='sim'
),
Node(
    package='learning_tf2_py',
    executable='turtle_tf2_broadcaster',
    name='broadcaster1',
    parameters=[
        {'turtlename': 'turtle1'}
    ]
),
2.2 종속성 추가
learning_tf2_py 디렉토리로 이동하여 setup.py, setup.cfg 및 package.xml 파일이 있는 위치로 이동하세요.
텍스트 편집기로 package.xml 을 열고 런치 파일의 가져온 명령문에 해당하는 다음 종속성을 추가합니다.
<exec_depend>launch</exec_depend>
<exec_depend>launch_ros</exec_depend>
이 코드는 코드가 실행될 때 추가로 필요한 launch 및 launch_ros 종속성을 선언합니다.
파일을 저장하세요.
2.3 setup.py 업데이트
setup.py 를 다시 열고 런치 파일이 launch/ 폴더에서 설치되도록 다음 라인을 추가합니다.
data_files 필드는 다음과 같이 보여야 합니다.
data_files=[
    ...
    (os.path.join('share', package_name, 'launch'), glob(os.path.join('launch', '*launch.[pxy][yma]*'))),
],
또한 파일 맨 위에 다음과 같은 가져오기를 추가합니다.
import os
from glob import glob
런치 파일을 생성하는 방법에 대한 자세한 내용은 이 튜토리얼 에서 알아볼 수 있습니다.
3 빌드
작업 공간의 루트에서 누락된 종속성을 확인하려면 rosdep 를 실행합니다.
rosdep install -i --from-path src --rosdistro humble -y
루트 디렉토리에서 패키지를 빌드하세요.
colcon build --packages-select learning_tf2_py
새 터미널을 열고 워크스페이스 루트로 이동하고 설정 파일을 소스하세요.
. install/setup.bash
4 실행
이제 터틀심 시뮬레이션 노드와 turtle_tf2_broadcaster 노드를 시작하는 런치 파일을 실행하세요.
ros2 launch learning_tf2_py turtle_tf2_demo.launch.py
두 번째 터미널 창에서 다음 명령을 입력하세요.
ros2 run turtlesim turtle_teleop_key
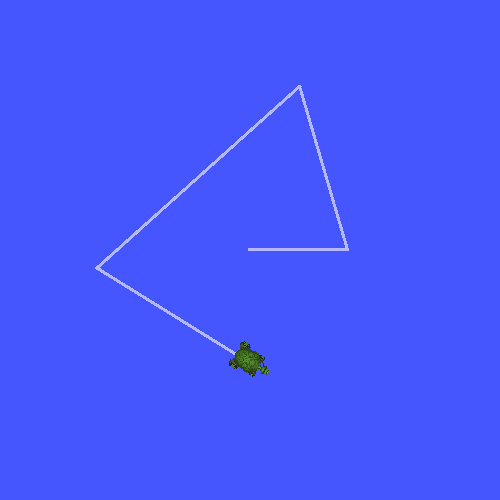
이제 제어할 수 있는 한 마리의 터틀이 있는 터틀심 시뮬레이션을 볼 수 있습니다.
이제 tf2_echo 도구를 사용하여 터틀 포즈가 실제로 tf2에 브로드캐스트되는지 확인하세요.
ros2 run tf2_ros tf2_echo world turtle1
이것은 첫 번째 터틀의 포즈를 표시해야 합니다.
화살표 키를 사용하여 터틀 주위를 움직이면 (turtle_teleop_key 터미널 창이 아닌 시뮬레이터 창이 활성화되어 있는지 확인하세요)
콘솔 출력에서 다음과 유사한 내용을 볼 수 있습니다.
At time 1625137663.912474878
- Translation: [5.276, 7.930, 0.000]
- Rotation: in Quaternion [0.000, 0.000, 0.934, -0.357]
At time 1625137664.950813527
- Translation: [3.750, 6.563, 0.000]
- Rotation: in Quaternion [0.000, 0.000, 0.934, -0.357]
At time 1625137665.906280726
- Translation: [2.320, 5.282, 0.000]
- Rotation: in Quaternion [0.000, 0.000, 0.934, -0.357]
At time 1625137666.850775673
- Translation: [2.153, 5.133, 0.000]
- Rotation: in Quaternion [0.000, 0.000, -0.365, 0.931]
world 와 turtle2 사이의 변화를 위해 tf2_echo 를 실행한다면, 두 번째 거북이는 아직 그곳에 없기 때문에 변화를 볼 수 없습니다.
그러나 다음 튜토리얼에서 두 번째 거북이를 추가하는 즉시 tf2에 turtle2 포즈가 방송됩니다.
요약
이 튜토리얼에서는 로봇의 자세(거북의 위치와 방향)를 tf2로 방송하는 방법과 tf2_echo 도구를 사용하는 방법을 배웠습니다.
tf2로 방송되는 변환을 실제로 사용하려면 다음 튜토리얼에서 다음과 같이 tf2 청취자 를 생성해야 합니다.